The Secret to Better Homemade Pizza Than Delivery
You don’t need a wood-fired oven or a three-day fermentation process to stop relying on delivery drivers every Friday night. I used to think that learning how to make homemade pizza meant I had to transform my kitchen into a professional pizzeria, complete with expensive stone decks and specialized flour that costs more than my grocery bill. Honestly? That’s just a recipe for unnecessary stress. After years of trying to follow those overly complicated, “authentic” recipes that leave you with a sink full of dishes and a soggy crust, I finally realized that the best pizza is the kind that actually gets eaten without a meltdown.
I’m not here to sell you on some culinary masterpiece that takes six hours to prep. Instead, I’m going to show you how to master the basics so you can get a crispy, delicious crust on the table in a fraction of the time. I’ll walk you through my streamlined, no-nonsense method for building a great pie using tools you already have in your pantry. We’re cutting out the fluff and focusing on the small, actionable wins that turn a chaotic weeknight into a win for the whole family.
Table of Contents
Recipe Details
Ingredients
- 2 cups all-purpose flour
- 1 packet active dry yeast
- 1 cup warm water
- 1 teaspoon sugar
- 1 teaspoon salt
- 1/2 cup tomato sauce
- 2 cups shredded mozzarella cheese
- 1/4 cup sliced pepperoni
Recipe Instructions
Step 1
First things first, let’s get the dough moving. I’ve learned the hard way that rushing yeast is a recipe for a flat, sad crust, so grab a bowl and mix your warm water, sugar, and yeast. Let it sit for about five to ten minutes until it gets foamy and active; if it doesn’t bubble, don’t waste your time—just start over with fresh yeast. Once it’s alive, stir in your flour and salt until it forms a shaggy mass, then turn it out onto a floured surface to knead.
Step 2
Now, give that dough some real work. Knead it for about eight to ten minutes—I usually do this while listening to a podcast—until it feels smooth and elastic under your hands. If it’s sticking to everything, add a tiny bit more flour, but don’t go overboard or you’ll end up with a brick. Place it in a lightly oiled bowl, cover it with a damp cloth, and let it rise in a warm spot until it has actually doubled in size.
Step 3
While that dough is doing its thing, prep your workspace and get your oven screaming hot. Most home ovens struggle with pizza, so I highly recommend using a baking stone or even a heavy inverted baking sheet. Crank your oven up to its highest possible setting—usually around 500°F—and let it preheat for at least forty-five minutes. You want that surface to be searing hot before the dough even touches it.
Step 4
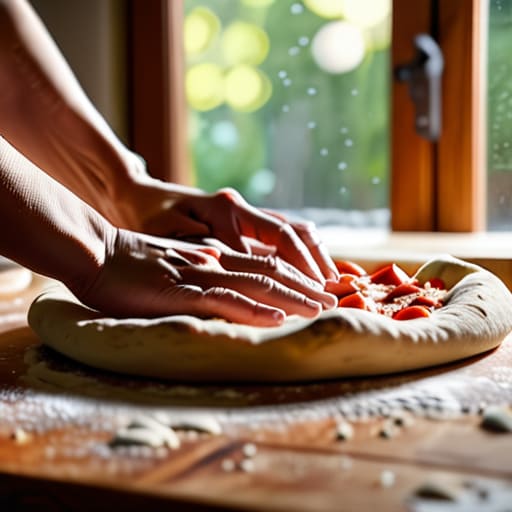
Once the dough has risen, punch it down and divide it into portions. I like to make two medium pizzas rather than one giant one, as it’s easier to manage. Instead of using a rolling pin, which can kill all those lovely air bubbles we worked so hard for, use your hands to stretch the dough from the center outward. If it keeps snapping back, let it rest for five minutes to relax the gluten, then try again.
Step 5
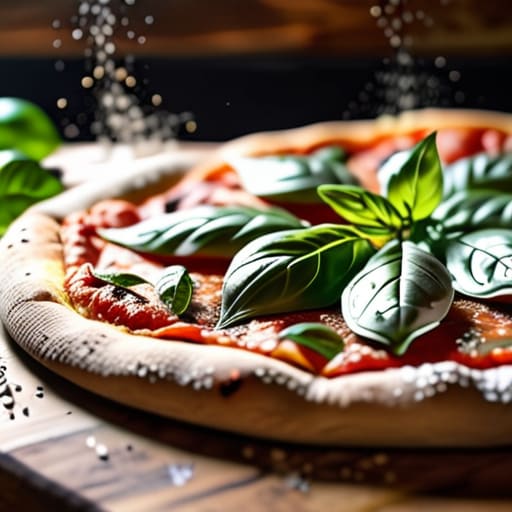
Now comes the fun part: the assembly. Spread a thin layer of sauce—don’t drown it, or you’ll get a soggy middle—and add your cheese and toppings. I’m a minimalist when it comes to toppings; too much weight will ruin the structural integrity of the crust. Slide your masterpiece onto the hot stone and bake for about 10 to 12 minutes. You’re looking for a crust that is golden-brown and slightly charred on the edges.
Step 6
Finally, pull it out and let it sit for just a minute or two before slicing. I know it’s tempting to dive in immediately, but letting the cheese set slightly makes it much easier to handle. Grab a cutting wheel, slice it up, and enjoy the fact that you just saved twenty bucks and a delivery fee with a little bit of intentional effort.
The Best Pizza Dough Recipe for Real Results
Look, I’ve spent way too many years trying to follow overly complicated, “authentic” Italian recipes that require three days of prep and a degree in chemistry. When you’re juggling a career and a house that never stays clean, you don’t have time for that. The secret to the best pizza dough recipe isn’t about rare imported flour; it’s about patience and temperature. If you want that perfect texture, my favorite yeast dough fermentation tips involve letting the dough rise in the fridge overnight. It develops a much deeper flavor and makes the dough significantly easier to stretch without it snapping back like a rubber band.
Once you’ve mastered the base, don’t feel like you have to stick to the classics. I love experimenting with easy pizza toppings ideas like hot honey and goat cheese, or even just a heavy hand of garlic and olive oil for a white pie. Just remember, when you’re baking pizza in a home oven, heat is your best friend. Crank that thing as high as it will go; we’re looking for a quick, intense blast to mimic a real stone oven.
Simple Homemade Pizza Sauce Ingredients That Actually Taste Good
Look, we’ve all been there—standing in the grocery aisle staring at a jar of pre-made sauce that’s essentially just sugar and salt masquerading as tomato. If you’ve already mastered the best pizza dough recipe, the last thing you want to do is ruin that hard work with mediocre sauce. The secret to great sauce isn’t a long list of exotic spices; it’s about high-quality canned San Marzano tomatoes and a bit of restraint. I always tell my clients that in organizational psychology, less is often more, and the same applies to your kitchen.
When gathering your homemade pizza sauce ingredients, keep it simple: crushed tomatoes, a pinch of sea salt, a splash of olive oil, and maybe a bruised clove of garlic. If you’re feeling adventurous, a tiny pinch of dried oregano can add that classic aroma, but don’t overdo it. You want the brightness of the tomato to shine through, not get buried under a mountain of dried herbs. If you’re aiming for a thinner consistency, just let the juices do the work rather than adding water, which can lead to a soggy mess when you’re finally baking pizza in a home oven.
Five Small Wins for a Better Crust and Less Stress
- Stop overworking your dough; if you knead it until your arms ache, you’re just making it tough, and nobody wants a pizza that feels like a chew toy.
- Get your oven as hot as it will go—I’m talking max temperature—because a lukewarm oven is the fastest way to end up with a soggy, sad center.
- Don’t drown the dough in sauce; it’s tempting to go heavy, but a little goes a long way, and keeping it light ensures the crust actually stays crisp.
- Prep your toppings before you even touch the flour; there is nothing more chaotic than trying to chop peppers while your dough is sitting out and drying out.
- Use a pizza stone or even a preheated heavy baking sheet to mimic a professional oven; that extra heat on the bottom is the secret to that perfect, golden crunch.
The Bottom Line for Better Pizza

Don’t get hung up on perfection; even if your crust isn’t shaped like a professional’s, as long as the ingredients are fresh, it’s going to taste better than any delivery box.
Quality over quantity matters—use the good olive oil and real cheese, because you’re going to taste the difference in every single bite.
Prep your workspace before you start the dough; a little bit of organization goes a long way in keeping the kitchen from turning into a flour-covered disaster zone.
Don't Overthink the Perfection

Look, at the end of the day, you’ve got the dough, you’ve got the sauce, and you’ve got the heat. You don’t need a wood-fired oven or a degree from a culinary institute to pull this off. If your crust isn’t perfectly symmetrical or your cheese isn’t distributed with mathematical precision, it doesn’t matter. What matters is that you used real ingredients and skipped the greasy cardboard box from the delivery guy. Remember: focus on the quality of your sauce and giving that dough enough time to rise, and the rest will take care of itself.
My goal with these guides is always to strip away the unnecessary noise so you can actually enjoy your life. Making pizza from scratch isn’t about adding another massive chore to your weekend to-do list; it’s about the small, intentional win of feeding your family something honest. So, clear off the kitchen counter, grab a glass of wine, and just start cooking. Life is far too short to spend it worrying about a slightly charred crust when you could be sitting down and enjoying a meal you actually made yourself. Get it done, and enjoy it.
Frequently Asked Questions
My dough isn't rising; did I mess up the yeast or is my kitchen too cold?
Don’t panic; it’s usually one of two things. First, check your water temperature. If it was too hot, you likely killed the yeast; if it was too cold, the yeast is just sleeping. Second, kitchens can be fickle. If your house is chilly, the dough won’t budge. Try moving it to a slightly warmer spot—like inside a turned-off oven with the light on. Give it time. Patience is part of the process.
Can I make the dough ahead of time and keep it in the fridge so I'm not scrambling on a weeknight?
Absolutely. In fact, I highly recommend it. If you want to stop the weeknight scramble, making the dough a day (or even two) ahead is your best friend. Just pop it in a lightly oiled bowl, cover it tight, and let it cold-ferment in the fridge. It actually develops a much better flavor that way. Just remember to pull it out about an hour before you’re ready to stretch it so it can hit room temperature.
What’s the best way to get that crispy, restaurant-style crust if I'm using a standard home oven?
Look, if you’re working with a standard home oven, stop expecting magic and start using heat to your advantage. The secret is a preheated baking stone or even a heavy cast-iron skillet. Get that thing screaming hot before the dough even touches it. I also swear by sliding the pizza onto the pan at the very bottom rack. It mimics that intense floor heat you get in a real pizzeria. Simple, effective, done.