A Simple Step-by-step Guide to Making Your Own Soap
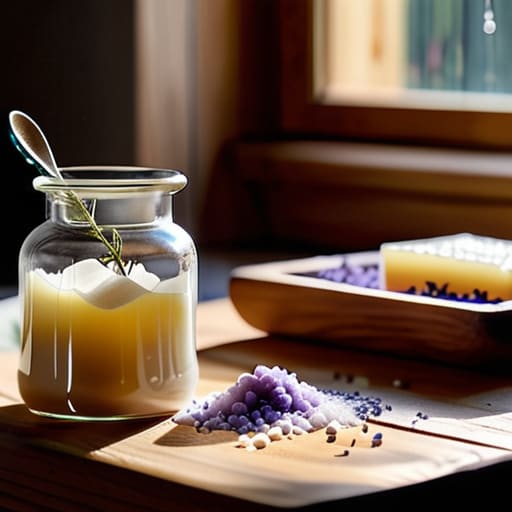
I was standing in the middle of my kitchen last Tuesday, staring at a pile of half-empty, neon-colored plastic bottles under the sink, and I just hit a wall. Between the kids’ schedules and my consulting clients, the last thing I wanted was more chemical-heavy clutter taking up space in my home. I realized then that most people think learning how to make soap requires a chemistry degree or a dedicated laboratory, but that’s just not true. It’s actually quite simple once you strip away the fancy jargon and the intimidating “expert” gatekeeping. You don’t need a sterile lab; you just need a clear countertop and a solid plan.
In this guide, I’m cutting through the fluff to show you the most efficient way to get a batch done without turning your kitchen into a disaster zone. I’m going to walk you through the essential tools, the basic ingredients, and the actual workflow you need to produce something high-quality and functional. We aren’t here to make artisanal sculptures that sit on a shelf; we are here to create reliable, everyday essentials that work. Let’s stop overcomplicating the process and just get your first batch made.
Table of Contents
Guide Overview
Tools & Supplies
- Digital scale for precise measurements
- Stick blender for emulsifying oils and lye
- Stainless steel or heat-safe plastic bowls
- Silicone molds for shaping
- Coconut oil (approx. 16 oz)
- Olive oil (approx. 16 oz)
- Sodium hydroxide/Lye (approx. 4-5 oz)
- Distilled water (approx. 10 oz)
- Essential oils (approx. 1 oz)
Step-by-Step Instructions
- 1. First things first: clear your workspace. I can’t tell you how many times I’ve lost a crucial ingredient because my kitchen counter looked like a junk drawer exploded. Clear off a large area, lay down some parchment paper, and make sure you have everything within arm’s reach. You don’t want to be hunting for a spatula when your oils are already heating up.
- 2. Grab your scale and weigh everything out. Forget those measuring cups; in soap making, precision is your best friend. If you’re off by even a little bit, you’ll end up with a bar that’s either too greasy or too harsh on the skin. I always double-check my numbers against my little notebook before I move to the next step—it saves a lot of heartache later.
- 3. It’s time to handle the lye, and please, be smart about safety. Put on your goggles and gloves; this isn’t the time to be casual. Slowly pour your lye into your distilled water—never the other way around, or you’ll end up with a chemical volcano in your sink. Once it’s mixed, set it aside in a safe spot to cool down. It’s going to get hot, so give it some space.
- 4. Now, melt your oils. Whether you’re using coconut oil, olive oil, or shea butter, get them in a stainless steel pot and heat them gently until they are liquid and clear. You want your oils and your lye water to be at roughly the same temperature before you combine them. If one is ice cold and the other is boiling, they won’t play nice together.
- 5. This is where the magic (and the workout) happens. Pour your lye water into your oils and grab your stick blender. Start with a few short pulses, then lift it out and back in. You’re looking for “trace”—that’s when the mixture reaches the consistency of pudding. Once it leaves a visible trail when you lift the blender, you’re officially in the home stretch.
- 6. Pour your mixture into your mold and smooth it out. If you have any air bubbles, give the mold a few firm taps on the counter to settle everything. Cover it with a piece of cardboard and a towel to keep the heat in, then leave it alone. I know it’s tempting to peek, but patience is part of the process.
- 7. Finally, once it’s firm (usually after 24 to 48 hours), pop it out of the mold and cut it into bars. But don’t you dare use them yet! You need to let those bars cure for at least four weeks in a cool, dry place. This allows the water to evaporate and makes the soap much harder and longer-lasting. Trust me, the wait is entirely worth it.
The Essential Soap Making Equipment List You Actually Need
Look, I’ve seen enough DIY projects turn into expensive clutter to know that you don’t need a professional laboratory in your kitchen. When I first started, I thought I needed every gadget under the sun, but that’s just a recipe for more mental load. For the cold process soap making method, you really only need the basics: a digital scale (precision is everything), a stainless steel pot, a stick blender, and some heat-resistant pitchers. If you try to eyeball measurements, you’re going to have a bad time, and I’m not about that life.
One thing I can’t stress enough is that your equipment needs to be dedicated. Once you start working with lye, those tools are soap-only. Don’t even think about using that same whisk for your Sunday morning omelet. Beyond the hardware, make sure you have a solid set of lye safety precautions in place—think goggles, gloves, and long sleeves. It sounds intense, but it’s just smart project management. We’re here to create something beautiful, not to end up in the emergency room because we skipped the basics.
Mastering the Cold Process Soap Making Method Without the Stress

Look, I get it. The idea of working with lye can feel a little intimidating when you first look at your soap making equipment list. But here’s the thing: once you respect the process, the fear disappears. The key to the cold process soap making method isn’t about being a chemist; it’s about being organized. I always tell my clients that preparation is half the battle. Before you even touch a single ingredient, make sure your workspace is clear, your goggles are on, and your lye safety precautions are top of mind. If you’ve got your station set up and your measurements ready, you aren’t “experimenting”—you’re executing a plan.
Once you’re comfortable with the basics, you can start playing with the fun stuff, like selecting the best essential oils for natural soap. I tend to stick to high-quality, pure oils because I want my skin to feel hydrated, not stripped. Don’t feel like you have to master complex scent layering on day one. Start simple. Pick one or two calming scents, get your batch poured, and let the timer do the work. It’s all about reducing the mental load by mastering one repeatable system at a time.
Five Things I Wish I Knew Before My First Batch

- Don’t skimp on the safety gear. I know, it feels like overkill when you’re just standing in your kitchen, but lye is no joke. Get your goggles and gloves on before you even touch a single ingredient. It’s better to feel a little silly than to end up in the ER.
- Stop eyeballing your measurements. This isn’t baking where a little extra flour won’t hurt; soap chemistry is precise. Use a digital scale for everything—even your water—and stick to the math. If the recipe says 500 grams, it means 500 grams, not “about half a kilo.”
- Clear your schedule for the cleanup. If you try to squeeze soap making into a twenty-minute window between errands, you’re going to have a bad time. You need time to let the soap trace, time to pour, and definitely time to scrub the equipment once it’s set. Plan for the mess so it doesn’t become a mental load later.
- Keep a “mistake notebook” right next to your workspace. I keep mine right by the sink. If a batch comes out too soft or the scent doesn’t quite hit the mark, write down exactly what you did differently. It’s the only way to turn a failed batch into a learning win.
- Resist the urge to use every pretty essential oil in your cabinet. Some scents play well together, and others just create a muddy, confusing mess. Start with one or two simple, reliable scents until you get the hang of how they react with the lye. Keep it simple until you’ve mastered the basics.
Three Things to Remember Before You Start

Don’t let the gear intimidate you; you don’t need a laboratory, just a few reliable tools and a clean workspace to get the job done.
Safety isn’t optional when you’re working with lye—wear your gear, stay focused, and treat the process with the respect it deserves.
Embrace the learning curve and remember that your first batch doesn’t have to be perfect to be useful; just get it made and refine it next time.
Final Thoughts Before You Cure

Look, I know it feels like a lot of moving parts right now—from weighing your lye solution to ensuring your oils hit that perfect trace. But if you’ve followed the steps, you’ve already done the heavy lifting. You’ve got your equipment ready, you’ve mastered the cold process, and you’ve avoided the trap of buying unnecessary gadgets. Now, the most important part is the waiting game. Don’t let the urge to rush things get the better of you; your soap needs that full six weeks to cure properly so it’s safe and long-lasting. Just set it on the shelf, tuck it away in a cool spot, and let the chemistry do its job.
At the end of the day, soap making isn’t about achieving some professional-grade, artisanal perfection on your first try. It’s about the quiet satisfaction of looking at a finished bar and knowing exactly what went into it. It’s about reclaiming a small piece of your routine from the clutter of store-bought chemicals and replacing it with something intentional and useful. You’ve checked a big task off your list, and honestly, that’s a win worth celebrating. Now, grab a coffee, take a breath, and enjoy the fact that you actually got it done.
Frequently Asked Questions
Is it actually safe to use these same tools for cooking later, or do I need a dedicated set?
Look, I’ll give it to you straight: Do not, under any circumstances, use your soap-making tools for cooking. I know we’re all trying to minimize clutter, but lye is no joke. Once a tool has been in contact with those caustic chemicals, it’s dedicated to the craft forever. Grab a cheap stainless steel pitcher and a dedicated whisk from the thrift store. It’s a small investment to keep your kitchen—and your family—safe.
What do I do if my soap batter starts to thicken too quickly while I'm working?
Don’t panic—this happens to the best of us, especially if your kitchen is running a little warm. If your batter starts seizing or thickening before you’re ready, grab your stick blender and give it a few more quick, vigorous pulses. If that doesn’t work, you can try gently warming the container in a warm water bath to loosen things up. Just move fast; once it hits that stage, the clock is ticking.
How long do I really have to wait before I can actually use the bars, or is the "curing" part just a suggestion?
Look, I get it. You’ve put in the work, the bars look beautiful, and you want to use them right now. But here’s the straight talk: don’t skip the cure. While the soap is technically “hard” after a few days, you really need to give it four to six weeks. This allows the water to evaporate, making the bar harder and much gentler on your skin. Patience now means a better lather later.




