Budget-friendly Diy Headboard Styles for Any Bedroom
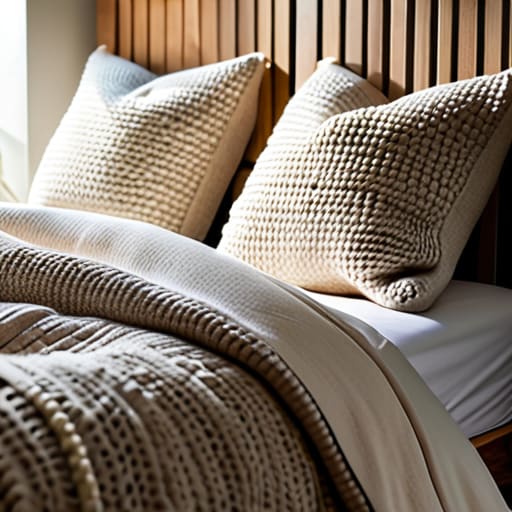
Look, I’ve spent enough time staring at the blank, beige expanse of my bedroom wall to know that a bare bed just feels unfinished. It’s one of those small details that, if ignored, makes your whole sleeping space feel more like a dorm room than a sanctuary. I used to think you needed a massive budget or a professional carpenter to fix it, but after years of tinkering with mid-century furniture in my garage, I’ve learned that’s just not true. You don’t need a showroom budget to find great diy headboard ideas; you just need a little bit of intention and the right plan to stop that awkward gap between your mattress and the wall.
In this post, I’m cutting through the Pinterest fluff to give you five straightforward, actionable projects that actually work. I’m sharing my favorite low-stress ways to anchor your bed, ranging from quick weekend builds to more polished, textured looks. Whether you’re working with scrap wood or a bit of fabric, these five ideas will help you reclaim your bedroom and finally get that cozy, intentional feeling you’ve been craving. Let’s get to work.
Table of Contents
The Scavenged Wood Slat Look

If you’re like me and find yourself wandering around local salvage yards or even just looking at the leftover scraps in your garage, this is your calling. You don’t need a fancy carpenter’s workshop to pull this off; all you really need is some decent wood—think cedar or even reclaimed pallet slats if you sand them down properly—and a few screws. I love this look because it adds an immediate organic warmth to a bedroom that can otherwise feel a bit sterile and cold.
The Sophisticated Fabric Panel

Sometimes, you just want a bedroom that feels cozy and quiet, especially after a long day of managing chaos. A DIY upholstered headboard is the ultimate way to add tactile comfort to your space without the massive price tag of a designer piece. I usually recommend starting with a simple plywood base and some high-density foam. It sounds intimidating, but once you realize it’s just a matter of stapling fabric over padding, you’ll realize it’s actually quite therapeutic.
The Mid-Century Painted Arch

For those of you who want a visual impact but don’t have the patience (or the tools) for heavy construction, I highly suggest the painted arch method. This is my go-to when I want to change the “vibe” of a room on a Sunday afternoon without making a mess of the floorboards. You aren’t actually building a physical object; you’re using color and geometry to create the illusion of a headboard. It’s minimalist, functional, and incredibly easy to change when you get bored of a color.
The Repurposed Vintage Frame

One of my favorite ways to reduce mental clutter is to give old, forgotten things a second life. If you’re lucky enough to find an old, ornate picture frame at a thrift store, don’t just hang it on the wall—turn it into a statement piece. I’ve spent many weekends restoring old frames, and there is something so satisfying about seeing a piece of history become a functional part of your home. You just need to secure the frame to the wall and decide what goes inside.
The Low-Maintenance Floating Shelf
If you’re a fan of the minimalist functionalist style, you probably want as much open floor space as possible. A thick, floating wooden shelf mounted horizontally across the wall serves as a brilliant, modern headboard. It provides a clean, sharp line that anchors the bed, and it’s incredibly practical for real life. You can lean a few framed photos or a small plant against it, giving you a bit of decor without the need for bulky nightstands.
Bottom Line: Get It Done Without the Stress
Don’t let “perfect” get in the way of “finished”—a simple, well-made headboard is better than a Pinterest-perfect dream that never actually happens.
Focus on function first; choose materials that are easy to clean and sturdy enough to handle real life, not just a showroom.
Use what you have or what’s affordable to avoid the mental clutter of a massive budget; the goal is a cozy, intentional space, not a debt-driven renovation.
Get Moving and Get It Done
At the end of the day, whether you’re leaning into a rustic wood plank look or going the more polished route with some upholstered fabric, the goal is the same: making your bedroom feel like a space that actually belongs to you. You don’t need a professional carpenter or a massive budget to pull this off. You just need a solid plan and a few hours of focused time. I’ve found that once you stop staring at that blank wall and actually start measuring and cutting, the intimidation factor completely disappears. Pick the project that feels the most manageable for your current skill level and just commit to the process.
I know how easy it is to let “someday” become a permanent fixture in your mental to-do list, but your home deserves better than half-finished ideas. A headboard isn’t just a piece of decor; it’s a way to anchor your room and provide a sense of stability in a busy, chaotic world. Don’t let the fear of a crooked nail or a messy glue line stop you from making a change. Grab your notebook, clear off your workbench, and make it happen. You’ll thank yourself every single morning when you wake up in a room that finally feels finished.
Frequently Asked Questions
Do I need specialized power tools for these projects, or can I get away with just a basic toolkit?
Look, I’m all for efficiency, not clutter. You don’t need a garage full of heavy machinery to make these happen. For most of these, a solid cordless drill, a hammer, and a level will get you through 90% of the work. If you’re doing the wood-slat version, maybe grab a cheap jigsaw, but don’t go overboard. Keep your toolkit lean and functional—buy what you actually need for the job at hand.
How do I make sure the headboard is actually secure and won't wobble or fall over while I'm sleeping?
Look, there is nothing worse than waking up to a headboard that’s shifted three inches to the left. If you’re worried about stability, don’t just lean it against the wall and hope for the best. For heavy wood projects, I always use L-brackets to anchor the frame directly to the wall studs. If you’re going lighter, at least use heavy-duty adhesive strips or a bit of non-slip rug padding between the wall and the board to kill that annoying wobble.
If I'm renting, are there any ways to do this without drilling permanent holes into my bedroom walls?
Look, I’ve lived in enough rentals to know the drill—you can’t exactly go around drilling holes into a landlord’s drywall without losing a security deposit. If you’re renting, skip the wall mounts. Instead, go for a freestanding headboard that just leans against the wall, or use a heavy-duty tension rod system. You can also get creative with command strips for lighter pieces, but honestly? A sturdy, floor-standing option is the ultimate low-stress win.




