Building Your Own Bookshelf: a Step-by-step Beginner Project
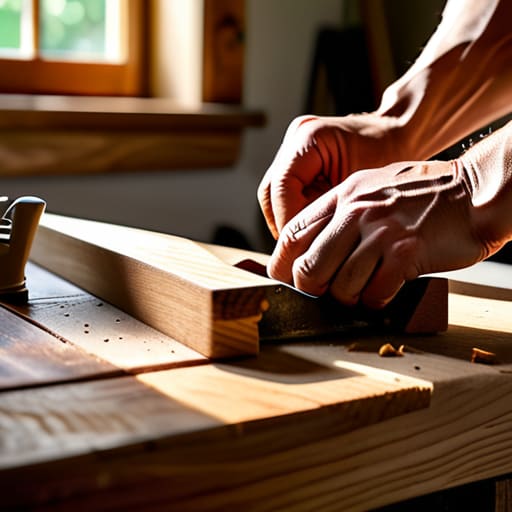
I was staring at a stack of heavy hardcovers leaning precariously against my hallway wall last Tuesday, wondering how I’d let things get this messy. Most people will tell you that learning how to build a bookshelf requires a massive workshop and a degree in carpentry, but honestly? That’s just a way to talk yourself out of getting started. I spent years thinking I needed fancy power tools and a perfect garage to tackle DIY projects, but the truth is that overcomplicating the process is usually what keeps our homes cluttered. You don’t need a masterclass; you just need a plan that actually works.
In this guide, I’m stripping away the jargon and the intimidating “pro” fluff to show you exactly how to build a bookshelf that is sturdy, functional, and fits your space. I’ll walk you through the essential measurements, the right wood choices for your budget, and the little shortcuts I’ve learned from years of restoring old furniture. My goal isn’t to turn you into a professional carpenter overnight; it’s to give you the small, actionable wins you need to clear that floor clutter and finally get your life organized. Let’s just get it done.
Table of Contents
Guide Overview
Tools & Supplies
- Circular saw or hand saw for cutting boards
- Power drill for driving screws
- Measuring tape for accuracy
- Sandpaper for smoothing edges
- Level to ensure stability
- 1×6 lumber (approx. 4-5 boards of 8ft length)
- Wood screws (1.5 inch, 1 box)
- Wood glue (1 bottle)
- Wood stain or paint (1 quart)
Step-by-Step Instructions
- 1. First things first, grab your tape measure and a pencil—and please, don’t rely on your eyes to estimate the length. You need to decide exactly how tall and wide this unit will be based on the specific nook you’re trying to fill. Once you have your dimensions, map out your cuts on your lumber. I always recommend a little extra breathing room for the wood, so don’t try to be too precious with every single millimeter.
- 2. Next, it’s time to get to the actual cutting. If you aren’t comfortable with a circular saw, don’t sweat it; most big-box hardware stores will make the heavy lifting for you if you bring in your cut list. When you get home, check that every piece is square and straight before you move on. If a board is bowed or wonky, it’s going to make your life miserable once you start trying to join the pieces together.
- 3. Now, let’s prep for assembly. I like to use wood glue on every joint because, frankly, screws alone can loosen over time with all the weight of those heavy hardcovers. Apply a thin, even bead of glue to the edges, then align your side panels with your top and bottom pieces. Use a few clamps to hold everything in place so you aren’t fiddling with shifting boards while you’re trying to drive in your screws.
- 4. Once the frame is clamped and steady, start driving in your screws. I suggest pre-drilling pilot holes every single time; it prevents the wood from splitting, and trust me, there is nothing more frustrating than seeing a fresh crack appear right as you’re finishing a piece. Aim for a clean, flush finish so the heads of the screws sit just below the surface of the wood.
- 5. Now we tackle the shelves. Instead of just slapping them in, I prefer to use small shelf pins or wooden cleats. This gives you the flexibility to adjust the height later on when you realize your oversized art books won’t fit in the standard spacing. If you’re going for a more permanent, sturdy look, you can screw them directly into the sides, but make sure your measurements are dead-on before you commit.
- 6. Don’t skip the back panel. Even a thin piece of plywood nailed into the back of the frame will prevent the whole thing from wobbling or “racking” to one side. It provides the structural integrity that turns a flimsy box into a solid piece of furniture. Just grab a hammer and a box of small finish nails and work your way around the perimeter.
- 7. Finally, we sand and finish. Start with a coarser grit to smooth out any rough spots from the construction, then move to a finer grit until the wood feels smooth to the touch. If you’re like me and you love that mid-century look, a simple wax or a clear matte sealant works wonders. It protects the wood without making it look like it’s covered in plastic, and it’s much easier to maintain in the long run.
Smart Custom Shelving Unit Plans for Busy Homes

Look, I know what you’re thinking: “Sarah, I don’t have time to play architect.” Believe me, I get it. Between managing freelance clients and trying to keep a suburban household from descending into madness, I don’t have hours to spend staring at blueprints. When I’m looking at custom shelving unit plans, I’m not looking for something museum-quality; I’m looking for something that fits the specific, weird dimensions of my nook and actually holds my heavy cookbooks without bowing.
If you’re working with limited space, don’t just build a standard rectangle. Think about verticality. If you have a narrow gap between a desk and a wall, aim for a tall, slim profile. The secret to a sturdy bookshelf design isn’t just the wood you choose, but how you anchor it. Always budget a little extra time for selecting the right shelf mounting hardware to ensure that once it’s up, it stays up. We aren’t just building furniture here; we’re building systems to reclaim our space. Let’s make sure they’re built to last.
Essential Woodworking Tools for Beginners to Get Started

Look, I’ve learned the hard way that you don’t need a garage full of industrial machinery to get this done, but you also can’t wing it with a dull kitchen knife and a prayer. When you’re first hunting for woodworking tools for beginners, my advice is to focus on precision over quantity. You’ll need a solid drill, a circular saw (or a hand saw if you’ve got the patience), and most importantly, a high-quality tape measure. I keep a dedicated notebook in my workshop just for checking my math twice; believe me, measuring and cutting wood is where most projects go sideways if you’re rushing.
Once you’ve got your basic kit, don’t overlook the little things that actually keep the unit from wobbling. A decent sander and some high-grit sandpaper are non-negotiable for finishing wood surfaces so they don’t snag your sweaters. Also, grab a level. It sounds simple, but if your shelf isn’t level, nothing in your house is going to feel quite right. Get the right tools, keep them organized, and let’s get to work.
Five Ways to Avoid a DIY Disaster

- Measure twice, cut once, and then measure a third time. I’ve learned the hard way that a quarter-inch error at the start turns your “simple project” into a wobbly mess that looks like it’s leaning mid-collapse.
- Don’t skip the sanding. It’s tempting to rush straight to the stain when you just want the job done, but if you don’t get those edges smooth now, you’ll be fighting splinters and uneven color for the rest of the month.
- Invest in decent wood glue. Screws hold things together, but glue is what actually makes the structure solid. If you want this shelf to survive moving house or a heavy collection of hardcovers, treat the glue step as non-negotiable.
- Plan for the weight. If you’re planning to house heavy art books or a massive collection of vintage vinyl, don’t skimp on the shelf thickness. A thin board will bow in the middle faster than you can say “structural failure.”
- Keep your workspace organized from the jump. I keep a little notebook nearby to track which screws go where; there is nothing more frustrating than finishing a build only to realize you have three leftover pieces and a very confused expression.
Three Things to Remember Before You Start Sawing
Don’t let perfectionism stall your progress; a sturdy, slightly imperfect shelf is infinitely better than a pile of expensive lumber sitting in your garage because you were too afraid to make the first cut.
Measure twice, cut once, and then measure a third time—saving five minutes of frustration now will save you two hours of trying to fix a mistake later.
Focus on functionality over flair by choosing materials and dimensions that actually solve your clutter problem rather than just looking pretty in a magazine.
Done and Dusted

At the end of the day, building this bookshelf isn’t about achieving woodworking perfection or having a workshop that looks like a professional studio. It’s about the fact that you gathered your tools, measured your space, and actually followed through on a plan. We’ve covered everything from picking the right wood to getting those joints tight and making sure the whole thing won’t tip over on your kids. You’ve got the essential tools, you’ve understood the custom plans, and now you have a tangible piece of furniture that didn’t cost a fortune at a big-box retailer. It’s about reducing the clutter and creating a dedicated spot for the things that matter, one shelf at a time.
I know that sometimes the hardest part of any project is just overcoming that initial hesitation—the “I’m not a carpenter” excuse. But honestly? Life is far too short to live around piles of unorganized books and half-finished projects. Once that last screw is in and you’re sliding your favorite novels into their new home, you’ll realize that the mental load of that mess has lifted just a little bit. Stop waiting for the “perfect” time to start your DIY journey and just get it done. You’ll be surprised at how much more capable you feel when your home finally works for you instead of against you.
Frequently Asked Questions
How do I make sure my shelves don't sag under the weight of heavy hardcover books?
Look, we’ve all been there—you build a beautiful shelf only to watch it bow under a collection of heavy hardcovers two months later. It’s frustrating. To prevent that sag, stop using thin, flimsy boards. Use at least 3/4-inch plywood or solid wood, and keep your spans short. If you want wider shelves, add a solid wood “cleat” or a thicker front edge to act as a spine. It’s about structural integrity, not just aesthetics.
What’s the easiest way to attach the unit to the wall so it doesn't tip over on my kids?
Look, I’ve learned the hard way with two teenagers that “sturdy enough” isn’t good enough—you need actual security. The easiest, safest way is using L-brackets. Screw one side into the top of your bookshelf and the other directly into a wall stud. If you can’t find a stud, please, don’t just use a standard nail; grab some heavy-duty drywall anchors. It takes ten minutes, but it’ll save you a massive headache later.
I'm worried about the finish; how do I get a smooth look without spending a fortune on professional tools?
Look, you don’t need a $500 orbital sander to get a professional finish. Most people skip the most important part: patience. Grab a pack of multi-grit sandpaper—start with 80 and work your way up to 220—and don’t rush the process. Sand with the grain, always. If you want that smooth, high-end feel without the price tag, a simple lint-free rag and a decent wipe-on poly will do the trick. Just keep it simple.




