Drill Basics: a Beginner’s Manual to Using Power Tools
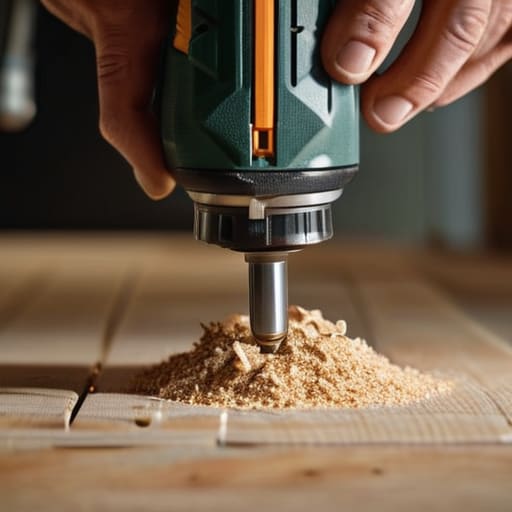
I was staring at a crooked, half-attached floating shelf in my hallway last Tuesday, feeling that familiar, rising heat of frustration in my chest. I had the tool, I had the hardware, and yet, I was one stripped screw away from a complete meltdown. Most people think you need a degree in engineering or a massive workshop to master basic home repairs, but that’s a lie that keeps us paralyzed. The truth is, learning how to use a drill isn’t about having the most expensive gear; it’s about understanding the rhythm of the tool so you stop fighting it and start making it work for you.
I’m not here to give you a technical manual that reads like a high school physics textbook. Instead, I’m going to walk you through the actual, hands-on mechanics of getting the job done without the headache. We’re going to cover everything from picking the right bit to managing that sudden kickback, all with a focus on intentional, efficient movement. By the time we’re done, you won’t just be poking holes in walls; you’ll have the confidence to tackle your next project with zero hesitation.
Table of Contents
Guide Overview
Tools & Supplies
- Power Drill (Cordless or corded drill driver)
- Drill Bit Set (Various sizes for different materials)
- Safety Glasses (1 pair)
- Workpiece (Wood, metal, or plastic depending on task)
Step-by-Step Instructions
- 1. First things first, you need to pick the right bit for the job. I’ve learned the hard way that using a wood bit on metal is a fast track to a frustrated afternoon. If you’re drilling into a wall, grab a masonry bit; if it’s a cabinet, go with wood. Once you have your bit, pop it into the chuck—that’s the adjustable sleeve at the front—and tighten it by hand or with the little key if your drill came with one. Just make sure it’s seated firmly so it doesn’t wobble when you start.
- 2. Next, let’s talk about the “clutch.” See that numbered ring right behind the chuck? That’s your best friend for preventing stripped screws. For most of my furniture restoration projects, I set it to a lower number so the drill stops spinning the moment it hits resistance. This prevents you from burying a screw too deep into a beautiful piece of mid-century teak or, worse, cracking the wood entirely.
- 3. Now, mark your spot. Never, and I mean never, just start drilling blindly. Take a pencil or a small nail and make a tiny indentation exactly where you want the hole to go. This gives the tip of the drill bit a place to “seat” itself so it doesn’t skitter across your wall or your tabletop like a runaway ice skater.
- 4. Get your stance right and hold the drill with both hands if you can. I like to keep one hand on the grip and use my other hand to steady the back of the tool. This gives you much better control over the pressure. You don’t want to lean your entire body weight into it; let the tool do the heavy lifting. Just apply steady, even pressure as you pull the trigger.
- 5. Start slow. When you first pull the trigger, don’t go full throttle. Start with a gentle squeeze to get the bit biting into the material. Once you feel the bit has found its groove and is moving steadily, then you can increase your speed. If you hear a high-pitched screeching or feel the drill vibrating aggressively, back off—you’re likely applying too much pressure or using the wrong speed.
- 6. If you’re drilling through something thick, like a heavy piece of timber, don’t try to do it all in one go. Pull the bit out halfway through the process to clear out the “dust” or debris. This prevents the hole from getting clogged and keeps the bit from overheating. It’s a small extra step that saves you from a burnt-out motor and a lot of wasted time.
- 7. Finally, once the hole is through, pull the drill straight back out along the same path you entered. Don’t twist it as you pull, or you might snag the edges of the hole you just worked so hard to make. Once you’re done, wipe down the bit and put it back in its spot. Keeping things tidy now means you won’t be hunting for that specific bit when you’re halfway through a project next weekend.
Cordless vs Corded Drill Choosing Your Home Efficiency Partner
Now, before you head to the hardware store, you need to decide on your primary tool. I’ve spent years toggling between the two, and honestly, the choice depends entirely on the job at hand. For most of my weekend projects—like hanging new shelving or tackling a mid-century sideboard restoration—I reach for a cordless drill without a second thought. The freedom to move around the house without tripping over an extension cord is a massive mental win. However, if you’re planning a heavy-duty renovation that involves drilling into wood and metal for hours on end, a corded model offers consistent power that won’t quit when the battery runs low.
If you’re just starting out, don’t feel like you need a professional-grade workshop. For a standard suburban home, a reliable 18V cordless drill is usually the sweet spot for efficiency. Just remember that power comes with responsibility; always keep your safety precautions for power tools at the front of your mind, like wearing eye protection and ensuring your workspace is clear. Once you have the right tool in hand, the rest is just about finding the right rhythm.
Drilling Into Wood and Metal Without the Chaos

When you’re moving from basic assembly to actual repairs, you’ll quickly realize that not all materials are created equal. If you’re drilling into wood, your biggest enemy is splintering. I always recommend using a sharp twist bit and starting with a shallow pilot hole to keep things clean. However, once you transition to drilling into wood and metal, the game changes entirely. Metal requires a much slower, steadier hand and a specific bit designed for high heat. If you rush through it, you’ll burn out your bit before you even finish the first hole, and trust me, that’s a frustrating waste of money.
The real secret to a professional finish, though, lies in adjusting drill torque settings. If you’re driving a screw into a delicate piece of mid-century veneer, you don’t want to bury it too deep or crack the surface. Keep that clutch setting low for precision work. Also, don’t forget the most basic safety precautions for power tools: always secure your workpiece with a clamp. Trying to hold a piece of metal with one hand while drilling with the other is a recipe for a very bad afternoon.
Five Pro Tips to Keep Your Project (and Your Sanity) on Track
- Mark your spots twice and drill once. I’ve learned the hard way that “eyeballing it” is a recipe for a crooked shelf and a very frustrated afternoon. Use a pencil to mark exactly where you want that screw to go before you even touch the trigger.
- Don’t fight the drill; let it do the work. If you find yourself leaning your entire body weight into the tool just to make progress, stop. You’re likely using the wrong bit or the wrong speed. A steady, even pressure is much more effective than brute force.
- Keep your eyes on the prize—and the bit. It’s easy to get distracted, but you need to watch the point of entry constantly. If the bit starts to wander or slip, pull back, reset, and try again. It’s much easier to fix a slight wobble now than a gaping hole later.
- Secure your workpiece like your life depends on it. There is nothing more stressful than trying to drill into a piece of wood that’s sliding across the workbench. Use a clamp or even a heavy-duty C-clamp to keep things stationary so you can focus on the task at hand.
- Listen to what the tool is telling you. A healthy drill has a consistent, rhythmic sound. If you hear a high-pitched squeal or a grinding noise, something is wrong—either your bit is dull or you’re applying too much heat. Take a breather, check your gear, and prevent a stripped screw before it happens.
Quick Wins for Your Next Project
Don’t rush the prep work; choosing the right drill type and bit for the material—whether it’s wood or metal—is the difference between a clean finish and a frustrating afternoon of stripped screws.
Prioritize your freedom of movement by opting for a cordless drill for most household tasks, but keep a corded option in mind if you’re tackling a heavy-duty project that requires constant, high-torque power.
Keep your workspace organized and your tools ready to go so that a simple repair doesn’t turn into a disorganized mess that eats up your entire weekend.
Putting Your New Skills to Work
At the end of the day, mastering your drill isn’t about becoming a master carpenter; it’s about having the confidence to handle the little things that tend to pile up. We’ve covered the essentials: picking the right tool for the job, whether that’s a cordless model for quick fixes or a corded one for heavy lifting, and knowing how to navigate different materials like wood and metal without making a mess. Remember, the secret to a successful project is often just proper preparation and choosing the right drill bit before you ever pull the trigger. If you take those few extra minutes to check your alignment and secure your workpiece, you’ll save yourself a massive headache down the line.
I know that staring at a pile of hardware or a loose cabinet handle can feel overwhelming when your to-do list is already a mile long. But I promise you, once you get that first hole drilled straight and true, the momentum shifts. You aren’t just fixing a shelf; you are reclaiming your space and reducing that mental clutter that comes with a broken home. Don’t wait for a professional to show up or for a “perfect” time to start. Grab your drill, tackle that one nagging repair, and enjoy the quiet satisfaction of a job well done. You’ve got this.
Frequently Asked Questions
What’s the difference between a drill and an impact driver, and do I actually need both in my toolkit?
Think of a drill as your versatile multitasker—it’s for making holes and precise work. An impact driver, however, is the heavy hitter; it uses rapid-fire bursts of force to drive long screws into tough wood without stripping the heads or wearing you down. If you’re just hanging pictures, a drill is plenty. But if you’re building a deck or tackling a DIY furniture project, trust me, you’ll want that impact driver to save your wrists.
How do I stop the drill bit from slipping or wandering when I'm trying to start a hole?
There is nothing more frustrating than a bit skidding across your wood and leaving a permanent scratch. To stop the wandering, I always use a center punch or even a sharp nail to create a tiny “dimple” first. That little indentation gives your bit a place to seat itself. Also, don’t rush—apply firm, steady pressure and start at a slow speed. Let the tool do the work, not your adrenaline.
Is it safe to use my drill on a brick wall, or am I going to end up with a mess and a broken bit?
Hold your horses—don’t just dive in with your standard wood bit. If you try that, you’ll end up with a smoking bit and a very frustrated afternoon. You can absolutely drill into brick, but you need a masonry bit and, ideally, a hammer drill. It’s a different beast entirely. Take it slow, use a bit of water to keep things cool, and you’ll get a clean hole without the mess.




