Stop the Water Waste: How to Fix a Running Toilet
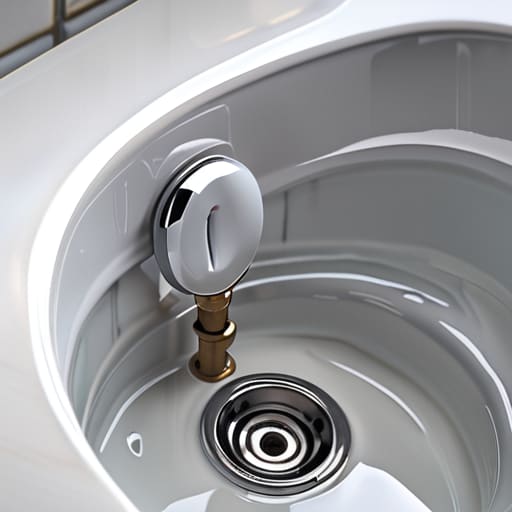
It was 2:00 AM, and that relentless, ghostly hissing sound was echoing through the hallway of my fixer-upper, making it impossible to drift back to sleep. I sat there in the dark, staring at the bathroom door, thinking about how much money was literally swirling down the drain while I lay awake. Most people think you need to call a plumber and drop a hundred bucks just to stop the noise, but let me tell you: learning how to fix a running toilet is one of those small, manageable wins that anyone can handle. You don’t need a degree in engineering; you just need to stop letting a tiny piece of rubber dictate your peace of mind.
I’m not here to give you a complicated manual filled with jargon that makes your head spin. Instead, I’m going to walk you through the actual troubleshooting steps I’ve used a dozen times to get my house back to being quiet and efficient. We’re going to look at the tank, identify the culprit—whether it’s a faulty flapper or a misaligned chain—and get it sorted. Let’s stop overcomplicating it and just get it done.
Table of Contents
- Step-by-Step Instructions
- Quick Wins Mastering Toilet Tank Components and Flush Valve Troubleshooting
- The No Nonsense Guide to Toilet Flapper Replacement and Fill Valve Adjustme
- My Pro-Tips for Keeping the Chaos at Bay
- The Bottom Line: Small Fixes, Big Savings
- Final Thoughts on a Quiet Bathroom
- Frequently Asked Questions
Guide Overview
Tools & Supplies
- Adjustable wrench for tightening bolts
- Screwdriver for securing tank components
- Pliers for gripping small parts
- Replacement flapper (1 unit)
- Replacement fill valve (1 unit)
- Replacement tank lever/handle (1 unit)
Step-by-Step Instructions
- 1. First things first, grab the lid off the tank. I know, it feels a little heavy and awkward, but you need to see what’s happening inside before you start turning anything. Once that lid is safely on the floor (please, don’t set it on the tile where it can crack), take a look at the water level. If it’s constantly spilling into the overflow tube, we’re likely looking at a float issue rather than a leak in the bowl.
- 2. Check the flapper. This is the most common culprit, and honestly, it’s usually the easiest fix. Reach in there—the water is clean, I promise—and feel the rubber seal at the bottom of the tank. If it feels slimy, warped, or brittle, it’s not creating a watertight seal anymore. If it’s just stuck, try nudging it back into place, but if it looks worn out, head to the hardware store and grab a replacement. It’s a five-minute job that saves a lot of money on your water bill.
- 3. Inspect the chain. I’ve seen this happen more times than I can count: the chain connecting the flush handle to the flapper gets too long and gets caught underneath the seal, or it gets so tangled that it won’t let the flapper drop back down. You want just enough slack to move freely without being so long that it interferes with the closing mechanism. Use a pair of pliers to adjust the clip if you need to.
- 4. Adjust the float level. If the water is still running because it’s constantly pouring into that open overflow tube, your float is set too high. Most modern toilets have a screw on the fill valve that you can turn with a screwdriver to lower the float. Think of it like calibrating a scale; you want the water level to stop about an inch below the top of that overflow tube.
- 5. Clean out the debris. Sometimes, it isn’t a broken part at all, but just a bit of mineral buildup or grit sitting in the valve that’s preventing a clean shut-off. Take a cloth and wipe down the rim of the flush valve and the underside of the flapper. Getting rid of that hidden buildup can often be the “magic fix” that stops the phantom running without you having to buy a single new part.
- 6. Test your work. Once you’ve made your adjustments, flush the toilet and then just… sit there for a minute. Watch the tank refill and listen closely. You want to hear the water stop completely and see the water level stabilize. If you still hear that faint, constant hiss, you might have a faulty fill valve, which means it’s time to swap out the whole assembly. Don’t sweat it, though; it’s a straightforward swap once you get the hang of it.
Quick Wins Mastering Toilet Tank Components and Flush Valve Troubleshooting

Once you’ve tackled the basics, it’s worth taking a second to look at the bigger picture of your toilet tank components. Sometimes, the issue isn’t a broken part, but just a simple misalignment. For instance, if you notice the water is constantly trickling into the overflow tube, you likely just need a quick toilet fill valve adjustment. Most of these valves have a screw mechanism that lets you dial in the perfect water level in the toilet tank; if that level is too high, it’ll pour straight into the overflow, wasting gallons of water without you even realizing it.
If you’ve already checked the water level and you’re still hearing that phantom trickle, it’s time for some deeper flush valve troubleshooting. A common culprit is a worn-out seal or a chain that’s too tight, preventing the flapper from seating properly. If the rubber feels slimy or looks warped, don’t bother trying to patch it—just grab a toilet flapper replacement from the hardware store. It’s a five-minute fix that’s much cheaper than a surprise water bill.
The No Nonsense Guide to Toilet Flapper Replacement and Fill Valve Adjustme

If you’ve already poked around the tank and realized the rubber isn’t sealing quite right, it’s time for a toilet flapper replacement. Honestly, don’t bother trying to clean an old, warped flapper; it’s a losing battle. When you head to the hardware store, take the old one with you so you don’t end up with something that doesn’t fit. It’s a five-minute job: pop the old one off the pegs, snap the new one on, and make sure the chain has just enough slack. If there’s too much tension, it’ll pull the seal open, and you’ll be right back where you started with those silent toilet leaks wasting water.
While you’re in there, take a second to check your toilet fill valve adjustment. If the water level in the toilet tank is constantly spilling into the overflow tube, your fill valve is set too high. Most modern valves have a simple screw or a sliding clip you can adjust to bring that water level down to about an inch below the top of the tube. It’s a tiny tweak, but it’s often the difference between a quiet, efficient tank and a constant, money-wasting trickle.
My Pro-Tips for Keeping the Chaos at Bay

- Don’t just tighten things; check the seal. Sometimes a running toilet isn’t about a broken part, but a loose nut or a misaligned gasket that just needs a quick adjustment.
- Keep a “toilet kit” in your utility closet. Having a spare flapper, some plumber’s grease, and a multi-tool on hand saves you from that frantic mid-repair run to the hardware store.
- Watch the water level. If the water is constantly spilling into the overflow tube, your fill valve is set too high. A quick turn of the adjustment screw can save you gallons of wasted water.
- Listen to the tank. If you hear a phantom flush every hour, you likely have a slow leak from the flapper. It’s a small fix that prevents a massive spike in your water bill.
- Clean the debris. Over time, mineral buildup can get under the flapper or inside the valve. A quick wipe-down with a non-abrasive sponge can often solve a “broken” part that’s actually just dirty.
The Bottom Line: Small Fixes, Big Savings
Most running toilets aren’t actually “broken”—they just need a quick adjustment to the flapper or the fill valve to stop the water waste.
Don’t let a minor drip turn into a massive water bill; if you hear that phantom flushing sound, tackle it the same day.
Keep a few basic replacement parts on hand in your utility closet so you can turn a household headache into a ten-minute win without a frantic trip to the hardware store.
Final Thoughts on a Quiet Bathroom

At the end of the day, fixing a running toilet usually comes down to one of three culprits: a worn-out flapper, a misaligned float, or a fill valve that’s just seen better days. We’ve walked through the process of popping that lid off, inspecting the components, and swapping out the parts that were causing the most grief. It might feel a bit intimidating when you first lift the tank lid, but once you realize it’s just a few simple pieces of plastic and rubber, the mental load of that constant dripping sound starts to lift. Remember, if you’ve adjusted the water level and checked the seal, you’ve already done the heavy lifting required to stop the waste and save yourself a headache on next month’s water bill.
I know that when you’re staring at a disassembled tank, it can feel like just one more thing on an endless to-do list. But there is a specific kind of satisfaction that comes from tackling a household nuisance head-on instead of letting it simmer in the background. By taking twenty minutes to fix this today, you aren’t just repairing plumbing; you are reclaiming your peace of mind and making your home work for you, rather than against you. So, grab your wrench, get it done, and then go enjoy the silence of a properly functioning house.
Frequently Asked Questions
I replaced the flapper, but the tank is still refilling constantly—did I miss something?
If you’ve already swapped the flapper and you’re still hearing that constant refill, it’s time to look at the fill valve. Most likely, the float is set too high, meaning the water level is rising past the overflow tube and just pouring straight down the drain. Grab a screwdriver and try adjusting the float height, or check if the valve itself is worn out. Don’t sweat it; we’ll get this quiet again.
Is it actually worth trying to fix this old toilet, or am I just throwing good money after bad?
Look, I’ve been there—staring at a dated fixture and wondering if it’s time to just call it quits. If your toilet is just leaking or running because of a worn-out flapper or a finicky valve, fix it. Those are cheap, ten-minute wins. But if the porcelain is cracked or the entire base is wobbling, stop. At that point, you’re chasing ghosts. Save your energy (and your wallet) and just buy a new one.
How do I know if the problem is actually a faulty fill valve versus just a simple clog in the overflow tube?
Here’s the trick: watch the water level. If the tank fills up and the water keeps pouring straight down into that open overflow tube, your fill valve isn’t shutting off—it’s a valve issue. But, if the water level is staying low and just won’t rise despite the valve clicking away, you likely have a clog or a leak somewhere else. It’s all about watching where that water is actually headed.




