The Best Way to Patch Denim Jeans for a Perfect Repair
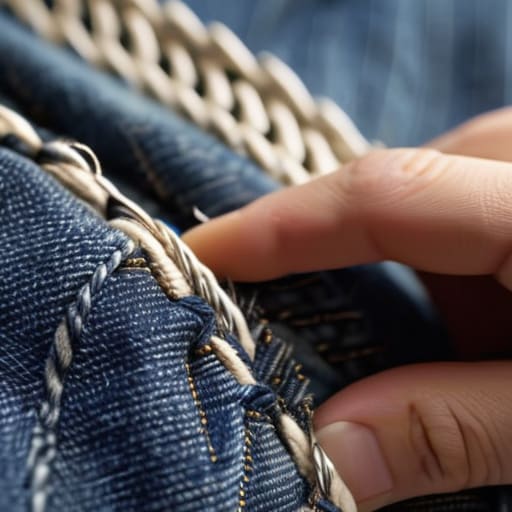
I was halfway through a Saturday morning project in the garage, trying to sand down a vintage teak sideboard, when I heard that dreaded rip. I looked down at my favorite pair of heavy-duty denim, and there it was—a gaping hole right at the knee that looked like it was destined for the rag bin. Most people will tell you that once the fabric gives way, the garment is officially dead, but that is a total myth. Learning how to patch jeans isn’t about performing surgery to make them look brand new; it’s about extending their life with a little bit of grit and the right technique.
I’m not here to sell you on complicated embroidery projects or expensive sewing machines that take up half your dining room table. Instead, I’m going to show you the straight-talking, efficient ways to mend your denim so you can stop wasting money on replacements. We are going to cover everything from the quick-and-dirty iron-on methods for when you’re in a rush, to the more durable, hand-stitched repairs that actually last through a wash cycle. Let’s quit letting a simple tear dictate your wardrobe and just get it fixed.
Table of Contents
Guide Overview
Tools & Supplies
- Needle and thread or sewing machine for attaching the patch
- Fabric scissors for trimming excess material
- Iron for flattening and setting seams
- Denim scrap or patch fabric of similar weight
- Thread matching the color of the jeans
- Fabric glue or fusible interfacing for stabilizing (optional)
Step-by-Step Instructions
- 1. First, grab a pair of fabric scissors and a needle and thread, and clear off your dining table so you actually have room to work. I’ve learned the hard way that trying to patch denim on a cluttered surface is a recipe for frustration. You’ll need a scrap of denim for the patch—an old pair of jeans that are beyond saving works perfectly—and a bit of stabilizer if the hole is particularly ragged.
- 2. Turn your jeans inside out and lay them flat. If the hole is fraying badly, use your scissors to trim away the loose, messy threads until you have a relatively clean edge. You don’t want those loose bits getting caught in your stitches and making the repair look bulky or uneven later on.
- 3. Place your patch piece on the inside of the jeans, directly behind the hole. If you’re going for a more “visible mending” look, you can place the patch on the outside, but for my daily drivers, I prefer the inside so the repair stays discreet. Pin the patch in place with a few sewing pins so it doesn’t shift while you’re working.
- 4. Now, start sewing using a simple running stitch or a whip stitch around the perimeter of the hole. If you want something more durable that can handle a heavy wash cycle, I highly recommend a zigzag stitch if you have a sewing machine handy. If you’re doing this by hand, just keep your stitches small and consistent; it’s more about steady progress than speed.
- 5. Once you’ve secured the edges, move to the center of the hole. You’ll want to work your needle back and forth across the opening to bridge the gap. This is where you really want to tighten things up to ensure the fabric is structurally sound again. I always tell myself to treat this like a small project in the house: if the foundation isn’t solid, the whole thing will fail.
- 6. Don’t forget to backstitch at the beginning and the end of your repair. This is a non-negotiable step if you want your hard work to last longer than one laundry day. Secure those knots tightly so you aren’t constantly pulling at loose threads every time you put the jeans on.
- 7. Finally, give the area a gentle tug to make sure everything feels secure, and then set your needle and thread aside. Don’t overthink whether it’s “perfect”—it’s fixed, it’s functional, and now you can get back to your actual life.
Quick Wins With Iron on Patches and Fabric Glue

Now, if you’re like me and don’t always have the patience for a full sewing session after a long workday, you need to embrace the shortcuts. Sometimes, you just want the hole gone without making a whole production out of it. That’s where fabric glue for denim becomes your best friend. It’s perfect for those tiny snags or fraying edges that aren’t quite “disaster” level yet. Just a small dab on the underside of the fabric can stabilize the area and keep the hole from growing while you decide if it’s worth a proper repair.
If you’re looking for something a bit more permanent but still want to skip the needle and thread, learning how to use iron-on patches is a total game changer. I keep a stash of these in my utility drawer for exactly this reason. The trick is to make sure your denim is bone-dry and completely flat before you press down; if you rush it, the adhesive won’t bond, and you’ll be back at square one. It’s all about minimal effort for maximum results so you can get back to your actual life.
Mastering Visible Mending Techniques and Sashiko Stitching

If you’re tired of trying to hide the damage and want to lean into the character of your clothes, it’s time to embrace visible mending techniques. I’ve always loved the idea that a repair shouldn’t be a secret; it should be a badge of honor. Instead of fighting the hole, you can turn it into a design feature using sashiko stitching for jeans. This Japanese method uses simple, running stitches to create beautiful geometric patterns that reinforce the fabric while looking intentional. It’s a meditative process that turns a frustrating tear into a piece of wearable art.
To get started, you don’t need a professional studio, just some sturdy thread and a needle. When you’re darning denim holes this way, the goal isn’t perfection—it’s durability. I like to layer a scrap of contrasting fabric behind the tear before I start stitching; it adds structure and a pop of color that makes the repair look like it was part of the original design. It’s a small, intentional way to extend the life of your favorite denim without needing a sewing machine.
Five Pro-Tips to Keep Your Denim Looking Sharp

- Don’t skip the pre-wash. If you’re patching a pair of jeans you haven’t worn in a while, wash them first. You don’t want to spend an hour meticulously sewing a patch only to have the denim shrink and warp the first time they hit the laundry.
- Match your thread weight, not just your color. If you’re using heavy-duty denim, a flimsy sewing thread is going to snap the moment you sit down. Grab a spool of heavy-duty polyester or even a dedicated denim thread to ensure that patch actually stays put.
- Trim the fraying before you start. I know it’s tempting to just sew right over the mess, but if you don’t snip those loose, fuzzy threads away first, they’ll get caught in your stitches and make the whole repair look bulky and amateur.
- Use a stabilizer if the fabric is thin. If your jeans are getting “soft” in the inner thighs, don’t just slap a patch on. Put a piece of lightweight interfacing on the inside first. It gives the fabric some backbone so your repair doesn’t just create a new saggy spot.
- Think about the “stress points.” When you’re placing your patch, make sure it extends at least an inch beyond the actual hole in every direction. If you only patch the hole itself, the tension from your movement will just rip the fabric right next to your new stitches.
The Bottom Line: Don't Overthink It
Choose your method based on the job; use iron-ons for a quick fix when you’re in a rush, but save the stitching for pieces you actually love and want to last.
Stop waiting for the “perfect” moment to mend; grab your kit and fix it now so you aren’t stuck staring at a hole in your favorite denim all week.
Remember that a little bit of visible mending isn’t a mistake—it’s a way to give your clothes a second life and a bit of character.
Don't Toss Them Just Yet

At the end of the day, whether you went the route of a quick fix with fabric glue or spent an evening mastering the art of Sashiko stitching, you’ve successfully kept a piece of clothing out of the landfill. We’ve covered everything from the low-effort iron-on patches for those busy Monday mornings to the more intentional, beautiful visible mending that turns a flaw into a feature. The important thing is that you didn’t let a small tear dictate whether a perfectly good pair of denim stayed in your closet or ended up in the trash. It’s all about having a toolkit of solutions ready so you can handle repairs without the stress.
I know that when life gets hectic—between work deadlines and keeping a household running—the last thing you want to do is fiddle with a needle and thread. But I promise you, there is a certain quiet satisfaction in fixing something with your own two hands. It’s a small, tangible way to reclaim control over your belongings and reduce the mental clutter of “stuff” we don’t actually need. So, grab your denim, find your supplies, and just get it done. Your favorite jeans are waiting to go back into rotation, and you’ll feel much better knowing they’re built to last a little longer.
Frequently Asked Questions
How do I stop the hole from fraying any further before I actually start patching it?
Honestly, I can’t tell you how many times I’ve seen a tiny snag turn into a massive tear because someone waited too long to act. If you aren’t ready to stitch just yet, grab some clear nail polish or a bit of fray check and dab it right along the edge of the hole. It’s a quick, messy-but-effective way to seal those loose threads in place so the damage doesn’t spread while it sits in your “to-do” pile.
Will my jeans look weirdly stiff or bulky if I use a heavy patch on thin denim?
Honestly? Yes, they will. If you slap a thick, heavy denim patch onto a pair of lightweight summer jeans, you’re basically creating a stiff, lumpy plate on your leg. It won’t drape right, and it’ll feel awkward when you move. If your denim is thin, stick to lightweight cotton scraps or even a decorative lace. Match the weight of the fabric to the weight of the jeans—it’s the only way to keep them feeling natural.
Can I still throw my jeans in the washing machine and dryer once they've been mended?
The short answer? Yes, but don’t be reckless about it. If you’ve used iron-on patches or glue, skip the high heat; the dryer is a killer for adhesives and can cause peeling. I always recommend turning them inside out and using a cold, gentle cycle to protect the stitching. It’s a little extra effort, but it keeps your hard work from unraveling after one wash. Let’s make these repairs actually last.




