Transform Your Kitchen With a Cabinet Painting Makeover

I used to think that if I wanted a high-end kitchen, I had to sink forty thousand dollars into a full-scale renovation and live out of a takeout box for three months. But honestly? That’s just a way to drain your savings without actually solving the problem. I learned the hard way during my first fixer-upper that knowing how to paint kitchen cabinets is the ultimate shortcut to a functional, beautiful home without the soul-crushing debt. You don’t need a contractor on speed dial; you just need a solid plan and the right attitude toward the prep work.
In this guide, I’m stripping away all the fancy jargon and expensive mistakes you see on those overly polished home renovation shows. I’m going to walk you through the exact, no-nonsense process I use to get a professional finish that actually lasts through the chaos of daily life. We’ll cover everything from the sanding stage to choosing the right finish, focusing on actionable wins that save you time. Let’s stop staring at those dated wood tones and finally get this project done.
Table of Contents
Guide Overview
Tools & Supplies
- Screwdriver or drill for removing hardware
- Sandpaper (120-220 grit) for smoothing surfaces
- High-quality synthetic brush for edges
- Small foam roller for smooth finishes
- Cabinet degreaser or TSP (1 bottle)
- Primer (1-2 gallons depending on size)
- Cabinet-specific enamel paint (1-2 gallons)
- Painter's tape (1 roll)
Step-by-Step Instructions
- 1. First things first: clear the decks. You can’t do a good job if you’re tripping over a toaster or a pile of mail. Empty everything out of the cabinets and drawers, and if you can, take the doors off entirely. I know, it seems like more work upfront, but trying to paint around hinges is a recipe for a messy, frustrating afternoon. Label every single door and its corresponding cabinet with a piece of painter’s tape so you aren’t playing a guessing game when it’s time to put them back.
- 2. Now, we tackle the cleaning. Kitchens are grease magnets, and if you don’t get that film off, your expensive paint will just peel right off in six months. Grab a heavy-duty degreaser—something like TSP (trisodium phosphate)—and scrub every inch of the wood. Don’t skip the corners or the undersides. You want these surfaces so clean that you could practically eat off them before you even touch a paintbrush.
- 3. This is the part most people try to skip, but please, don’t. You have to sand. You aren’t trying to strip the wood down to nothing; you just need to scuff the surface so the primer has something to grab onto. Use a medium-grit sandpaper to take the shine off the existing finish. Once you’re done, wipe everything down with a tack cloth to remove every last speck of dust. If there’s dust left, your finish will feel like sandpaper.
- 4. Time for the primer. This is the most important layer in the whole process. Don’t go cheap here; buy a high-quality, stain-blocking primer. This prevents the old wood tannins or any lingering oils from bleeding through your beautiful new color. Apply it in thin, even coats. It’s much better to do two thin layers than one thick, gloppy one that takes forever to dry.
- 5. Once the primer is bone-dry, it’s time for the fun part: the paint. I highly recommend using a specialized cabinet paint or a high-quality enamel. These are designed to dry harder and smoother than standard wall paint, which is crucial for surfaces that get touched a hundred times a day. Use a high-density foam roller for the large flat areas to avoid brush marks, and a small, high-quality brush for the intricate details and corners.
- 6. Patience is your best friend here. Apply your first coat, and then for the love of all things organized, let it dry completely before even thinking about a second coat. If you rush this, you’ll end up with a tacky mess that attracts dust and hair. Most quality cabinet paints require at least a few hours between coats, but check the can for specifics.
- 7. Finally, let’s talk about the “cure” time. Just because the paint feels dry to the touch doesn’t mean it’s ready for heavy use. It actually takes a few days (sometimes up to two weeks) for the paint to reach its full hardness. Be gentle with them for the first week. Once they’re cured, reattach your hardware, hang the doors, and finally enjoy that kitchen you worked so hard to transform.
The Essential Cabinet Painting Supplies Checklist
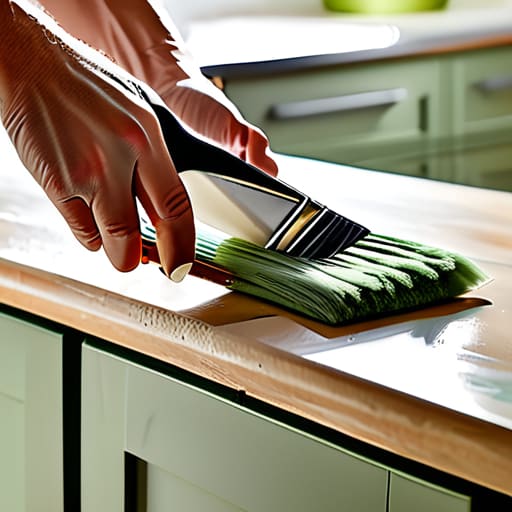
Before you go running to the hardware store, let’s get one thing straight: the quality of your tools dictates whether this project feels like a triumph or a total nightmare. I’ve learned the hard way that skimping on the basics is a recipe for frustration. When I’m putting together my cabinet painting supplies checklist, I always prioritize high-quality brushes and a decent microfiber roller. If you want to avoid the headache of preventing brush marks on cabinets, invest in a high-quality synthetic brush rather than the cheapest option on the shelf. It makes a world of difference in how smooth that final coat looks.
Don’t forget the unsung heroes of the process: your abrasives and cleaners. You can’t just slap paint over grease and old finish; you have to know how to prep cabinets for painting by using the right grit of sandpaper. I usually keep a few different grits handy for various cabinet sanding techniques, moving from coarse to fine to ensure a seamless surface. And please, grab a high-quality degreaser. If you don’t strip away the cooking oils first, that expensive paint isn’t going to stick, and you’ll be back at square one by Monday morning.
Mastering How to Prep Cabinets for Painting
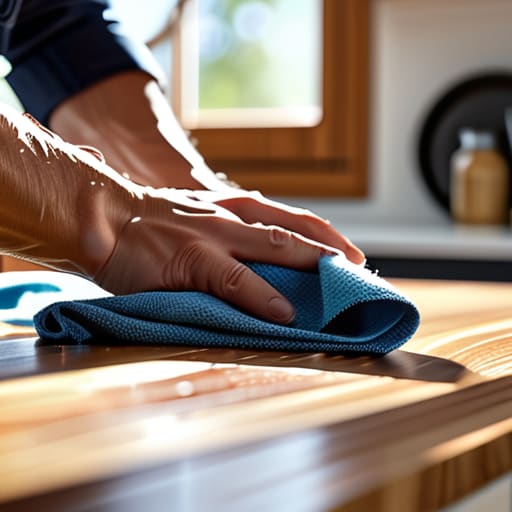
Look, I’m going to be blunt: if you skimp on the prep, you’re essentially throwing your weekend—and your money—straight into the trash. I’ve seen too many DIYers rush straight to the color because they want that instant gratification, only to end up with peeling paint three months later. When it comes to how to prep cabinets for painting, the real work happens before you even open a can of pigment. You need to get every bit of grease, cooking oil, and old wax off those surfaces. I always keep a heavy-duty degreaser on hand; if the surface isn’t clinically clean, your new finish won’t stick, and no amount of expensive paint can fix a bad foundation.
Once you’ve scrubbed them down, it’s time to talk about effective cabinet sanding techniques. You aren’t trying to strip the wood down to the grain; you’re just “scuff sanding” to create a profile for the primer to grab onto. I usually start with a medium grit and move up to a fine grit to ensure everything feels smooth to the touch. This step is non-negotiable if you want to avoid a bumpy finish that catches the light in all the wrong ways. Take your time here—it’s the difference between a professional look and a “home project” look.
Five Pro Tips to Save Your Sanity (and Your Finish)
- Don’t rush the drying time between coats; I know it’s tempting to get it over with, but if you apply a second layer too soon, you’ll end up with a tacky mess that feels like glue.
- Use a high-quality microfiber cloth to wipe away every last speck of dust after sanding, because even one tiny grain of grit will show up like a mountain once that paint hits the wood.
- Invest in a good quality small foam roller for the flat surfaces rather than just using a brush; it gives you a much smoother, factory-like finish that doesn’t scream “DIY project.”
- Label everything as you go—I keep a little notepad handy to mark which hinge goes to which door, because nothing kills my momentum faster than a pile of unorganized hardware at the end of the day.
- Work in small, manageable sections rather than trying to tackle the whole kitchen in one frantic burst; it keeps the paint from drying unevenly and keeps your stress levels under control.
Three Things to Remember Before You Pick Up the Brush
Don’t skimp on the prep work; I know it’s tedious, but a clean, sanded surface is the only way to make sure your hard work doesn’t peel off in six months.
Buy quality paint and tools—it’s much more frustrating (and expensive) to have to redo the whole kitchen because you tried to save twenty bucks on a cheap brush.
Patience is your best friend here, so give each coat plenty of time to dry completely so you don’t end up with a sticky, tacky mess.
You’re Almost at the Finish Line
Look, I know it feels like you’ve just run a marathon. Between the degreasing, the endless sanding, and that final, nerve-wracking coat of paint, your kitchen has probably looked like a construction zone for days. But take a second to look at what you’ve actually accomplished. You didn’t just slap some color on a piece of wood; you did the heavy lifting by prioritizing a properly prepped surface and choosing the right tools. Remember, the secret isn’t in buying the most expensive equipment, but in the discipline of the process. If you followed those prep steps and didn’t rush the drying times, you’ve already done the hard part. Now, all that’s left is to clean up the sawdust and let the finish cure.
There is a specific kind of peace that comes from looking around a room and knowing you improved it with your own two hands. It’s not just about the aesthetic upgrade or the boost in your home’s value; it’s about the fact that you stopped letting those dated cabinets dictate the mood of your home. You took a chaotic project and turned it into a functional win. So, grab a cup of coffee, sit down at your newly refreshed counter, and actually enjoy the space you worked so hard to create. You earned it.
Frequently Asked Questions
How long do I actually have to wait before I can start using my kitchen again without ruining the finish?
Here’s the truth: just because the paint feels dry doesn’t mean it’s finished. You can usually wipe down the counters after 24 hours, but please, for the love of your sanity (and your finish), give those doors a full week before you go heavy-handed with them. Paint takes weeks to truly cure. If you start banging pots and pans against them too soon, you’ll end up with chips that’ll make you want to cry. Be patient.
Is it worth the extra effort to sand everything down, or can I get away with just using a high-quality primer?
Look, I get the temptation to skip the sanding—I’ve been there on a Sunday afternoon when the house is quiet and I just want to be done. But if you want this to last more than six months, don’t skip it. A high-quality primer is great, but it isn’t magic. You need that mechanical bond. Sanding just enough to scuff the surface ensures the paint actually sticks instead of peeling off the moment you bump a cabinet.
What's the best way to prevent those annoying brush marks from showing up on the cabinet doors?
Look, I’ve spent enough hours staring at uneven brush strokes on a mid-century sideboard to know how frustrating they are. To avoid them, ditch the cheap brushes. Invest in a high-quality synthetic brush or, better yet, use a small foam roller for those flat surfaces. The secret is working in small sections and not overthinking it—don’t keep brushing a spot once it starts to set. Just lay it on smooth and leave it alone.