Fun and Easy Birdhouse Building Projects for Families
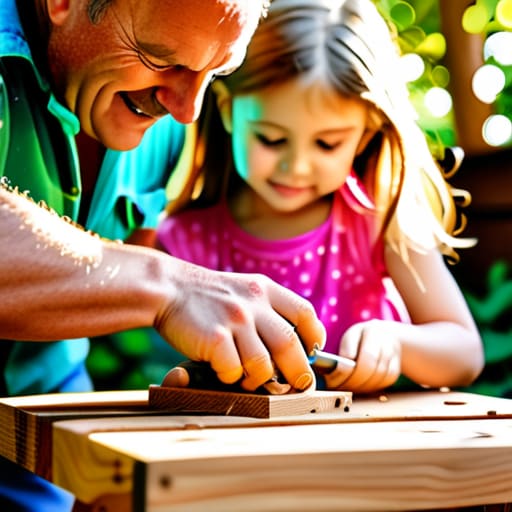
I was standing in my garage last Saturday, staring at a pile of cedar scraps and a set of overly complicated blueprints that looked more like a math exam than a weekend project. Honestly, most people make learning how to build a birdhouse feel like you need a master’s degree in carpentry just to get a single piece of wood straight. We’ve all been there—buying the expensive specialized tools and getting halfway through a project before realizing we’ve actually just created a mountain of sawdust and a massive headache.
I’m over the fluff and the unnecessarily complex designs that take up more space in your brain than they do in your garden. In this guide, I’m stripping everything back to the basics so you can stop overthinking and start doing. I’ll show you exactly how to pick your materials, make the right cuts, and assemble a sturdy little home for your local birds without the stress. We aren’t aiming for museum-quality perfection here; we are aiming for functional, simple, and done. Let’s get those tools out and finally cross this off your list.
Table of Contents
Guide Overview
Tools & Supplies
- Hand saw or miter saw for cutting wood
- Hammer for assembling pieces
- Drill with small bits for pilot holes and entry hole
- Tape measure for precise dimensions
- Untreated cedar or pine board (approx. 1x6x4 feet)
- Galvanized nails or exterior screws (small pack)
- Wood glue (waterproof)
- Sandpaper (medium grit)
Step-by-Step Instructions
- 1. First things first, let’s get our supplies together so we aren’t running back and forth to the garage halfway through. You’ll need a single piece of untreated cedar or pine—about 1×6 inches—a handful of galvanized nails, a hammer, and a drill. I always tell my clients that preparation is half the battle, so lay everything out on your workbench before you even touch a saw.
- 2. Now, let’s get to the cutting. You need to measure and cut your wood into six pieces: a base, a roof, a back, a front, and two sides. Don’t worry about making it a masterpiece; we’re aiming for functional, not fancy. Just make sure your sides are slightly shorter than the front piece so there’s a little gap at the top for air circulation—birds hate a stuffy house.
- 3. Once you have your pieces, it’s time to drill the entrance hole. This is the most important part because the size of the hole determines who moves in. For most small songbirds, a 1.5-inch hole is the sweet spot. Use a spade bit and take your time so you don’t split the wood; there’s no sense in ruining a good piece of cedar because we were in a rush.
- 4. Let’s start the assembly by nailing the sides to the back piece. I prefer using galvanized nails because they won’t rust when the weather gets nasty. Keep your movements steady and don’t overthink the alignment too much—as long as the walls are square, the birds won’t care if it’s off by a millimeter.
- 5. Next, nail the floor into place between those sides. Here’s a pro tip from my DIY days: drill a few small drainage holes in the bottom corners. It’s a tiny detail, but it keeps the nest dry, and preventing rot is much easier than replacing a soggy birdhouse next season.
- 6. Now, attach the front piece. If you want to be really smart about it, only put nails at the top of the front panel so it can act as a “swing door.” This makes it so you can actually clean out the old nesting material once a year without having to tear the whole thing apart.
- 7. Finally, grab that roof and nail it onto the top. Make sure it has a decent overhang to protect the entrance from rain. Once it’s secure, find a sturdy tree or a post in your yard and get it mounted. Now, cross it off your list and go grab a cup of coffee; you’ve earned it.
Picking the Best Wood for Birdhouses Without the Stress

Look, I know the hardware store aisle can feel like a sensory overload, especially when you just want to finish this project and move on. You don’t need an expensive slab of exotic mahogany to make a happy bird. In fact, most of those fancy woods are a waste of money. When I’m looking for the best wood for birdhouses, I always stick to the basics: cedar, redwood, or pine. These are sturdy, readily available, and—most importantly—they handle the elements without needing a constant coat of paint.
One thing I learned the hard way during my early DIY days is to avoid pressure-treated lumber. I used to think more chemicals meant more durability, but those toxins aren’t great for the little guys moving in. You want something natural that can stand up to the rain. If you’re worried about protecting birdhouses from weather, just focus on choosing a wood with a bit of natural oil content, like cedar. It’ll weather beautifully over time, turning that lovely silvery-grey, and you won’t have to spend your weekend obsessing over weatherproofing every single seam. Keep it simple, keep it natural, and just get it done.
Essential Woodworking Tools for Birdhouses You Actually Need

Look, you don’t need a professional-grade workshop or a massive budget to get this done. I’ve learned the hard way that buying every gadget in the aisle is just a way to clutter your garage and drain your bank account. For this project, you really only need the basics: a reliable handsaw or miter saw, a drill with a few bits, a hammer, and some galvanized nails. If you’re looking for the most efficient woodworking tools for birdhouses, focus on precision with your drill. Getting that safe birdhouse entrance hole size exactly right is the difference between a successful nesting site and a predator-friendly target.
Once you have your cuts ready, don’t overcomplicate the assembly. When it comes to attaching birdhouse roof panels, I prefer using exterior-grade screws or nails rather than just glue; you want something that won’t give up when the seasons shift. I always keep a small level and a tape measure handy—not because I’m a perfectionist, but because accuracy saves you from a headache later when things don’t line up. Keep it simple, keep it sturdy, and just get it built.
Five Small Wins to Keep Your Birdhouse From Becoming a Project Failure

- Skip the fancy paint and stains; birds don’t care about your aesthetic, and most chemicals are actually toxic to them. Stick to raw, untreated wood to keep the residents safe and your cleanup simple.
- Don’t obsess over making it look like a miniature mansion. Birds want a sturdy, boring box that offers protection from the wind and rain, not a Pinterest-worthy centerpiece with unnecessary trim.
- Make sure you drill a few small drainage holes in the bottom and a couple of ventilation gaps near the top. If you don’t, you’re basically building a little wooden sauna that’ll trap moisture and heat.
- Forget the perches. I know they look cute in diagrams, but they actually just give predators a convenient place to sit while they wait to raid the nest. A simple entry hole is all they need.
- Plan for easy cleaning by making one side or the roof removable. If you can’t get inside to clear out last year’s mess, you’re just inviting pests to move in, and that’s more mental load you don’t need.
The Bottom Line: Just Get It Done
Don’t let the pursuit of perfection stall your progress; as long as you use untreated wood and keep the design simple, the birds won’t care if your measurements aren’t down to the millimeter.
Stick to the basics with your tool kit—you don’t need a professional workshop, just the essential gear to make clean cuts and secure the pieces together.
Focus on functionality over flair; a sturdy, well-placed birdhouse is a much better win for your backyard than a fancy one that falls apart after the first rainstorm.
Finishing the Job

At the end of the day, building a birdhouse isn’t about achieving woodworking perfection or having a garage full of expensive power tools. It’s about the fundamentals: picking a durable, weather-resistant wood like cedar, using the basic tools you already have on hand, and following a straightforward assembly process that doesn’t leave you staring at a pile of sawdust in frustration. We’ve stripped away the fluff and the complicated blueprints to focus on what actually matters—creating a sturdy, functional shelter that can stand up to the elements. Once those pieces are joined and the entrance hole is drilled, you’ve officially moved this from a “someday” project to a completed task on your list.
Now, take that finished birdhouse outside and find a good spot to hang it. Don’t worry if the edges aren’t perfectly sanded or if your drill lines are a little crooked; the birds aren’t going to care about your craftsmanship, they just want a safe place to nest. There is something incredibly satisfying about looking out your window and seeing a little piece of your own handiwork coming to life in the backyard. So, stop overthinking the details, hang that house up, and get back to enjoying your weekend. You’ve earned the win.
Frequently Asked Questions
Do I really need to paint or stain the outside, or will that mess with the birds?
Look, I get the urge to make it look pretty to match your patio decor, but let’s keep it simple: skip the paint and stain on the outside if you can. Those chemicals can be nasty for the birds, and frankly, raw wood looks much more natural in a garden anyway. If you absolutely must add some color, stick to a water-based, non-toxic finish, and for heaven’s sake, never paint the inside.
How high up should I actually mount this thing so it stays safe from predators?
Look, I don’t want to see your hard work become a snack for a neighborhood cat or a squirrel. Aim for anywhere between five and ten feet off the ground. That’s the sweet spot. Mount it on a sturdy post or a tree trunk, and if you can, keep it away from low-hanging branches that act like a highway for predators. Keep it high, keep it steady, and let the birds do their thing.
What's the best way to clean it out at the end of the season without breaking the whole thing?
Don’t go overboard with the scrubbing; you don’t want to strip the finish or damage the wood. Once the birds have moved on, just tip it out and use a stiff brush to sweep out the old nesting material. If things are looking particularly grimy, a quick wipe with a mild, non-toxic soap and water does the trick. Dry it completely before you put it back up. Simple, clean, and done.




