Getting Started With Resin Art: a Simple Guide for Beginners
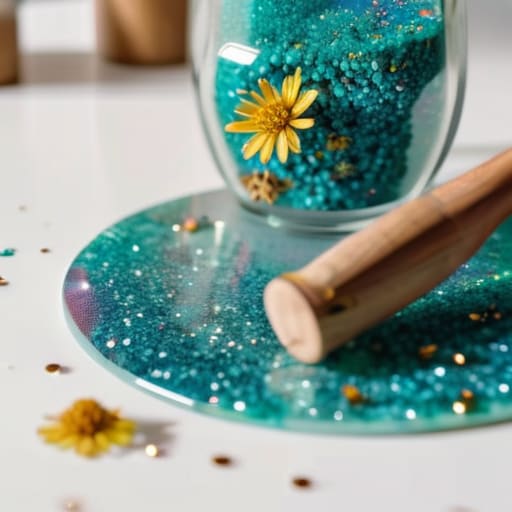
I was staring at a sticky, half-hardened mess on my kitchen island last Tuesday, wondering why my “easy” DIY project looked more like a science experiment gone wrong. If you’ve ever felt like you need a PhD and a laboratory-grade ventilation system just to make a simple coaster, I have news for you: you don’t. Most people think you need a mountain of expensive molds and high-tech equipment to start, but the truth is that resin crafts for beginners are actually much more approachable when you strip away the social media fluff. You don’t need a perfect studio; you just need a clear workspace and a bit of patience.
I’m not here to sell you on a lifestyle of perfection, but I am here to help you actually finish something. In this guide, I’m cutting through the noise to give you a straightforward, no-nonsense roadmap for your first few pours. We’ll cover the essential gear that’s actually worth your money, how to avoid those dreaded air bubbles, and a few projects that yield real results without the headache. Let’s stop staring at the supplies in the box and finally get to work.
Table of Contents
- Step-by-Step Instructions
- The Essential Resin Art Supplies You Actually Need
- Mastering Resin Mixing Ratios for Beginners Without the Mess
- Five Ways to Keep Your Resin Projects from Turning into a Total Disaster
- Three Things to Remember Before You Start Pouring
- Making It Your Own
- Frequently Asked Questions
Guide Overview
Tools & Supplies
- Silicone molds for shaping the resin
- Mixing cups for measuring and stirring
- Wooden sticks for stirring
- Heat gun or lighter to remove bubbles
- Protective gloves to prevent skin contact
- Epoxy resin kit (2-part resin and hardener)
- Liquid pigments or mica powder for color
- Glitter or dried flowers for decoration
- Sandpaper for smoothing edges
Step-by-Step Instructions
- 1. First things first, you need to set up your workspace properly. Resin is messy, and I don’t mean “oops, I spilled some coffee” messy—I mean “this is going to stick to your kitchen table forever” messy. Clear off a flat surface, lay down a thick layer of silicone mats or even some cheap plastic sheeting, and make sure you have plenty of ventilation. Open a window; you don’t want to be breathing in those fumes while you’re trying to focus.
- 2. Grab your supplies, but let’s keep it simple so you don’t get overwhelmed. You’ll need a high-quality two-part epoxy resin, some silicone molds, mixing cups, wooden stir sticks, and a few basic pigments or dried flowers. I always tell my clients that investing in decent resin upfront saves you from a mountain of frustration when your project comes out cloudy or tacky.
- 3. Now, let’s talk about the most critical part: the mix. Read your specific resin bottle like it’s a contractual agreement—it’s not a suggestion. Most kits require a 1:1 ratio by volume, so use your graduated cups to be exact. Pour slowly and stir with a steady hand for at least three full minutes. I know it feels like you’re just swirling liquid, but you have to ensure every bit of hardener is thoroughly integrated to avoid those annoying soft spots.
- 4. Once your resin is mixed, it’s time to add your personality. If you’re using pigments, stir them in gently to avoid creating a million tiny bubbles. If you’re making something like a coaster with dried flowers, I suggest pouring a very thin base layer first, letting it get slightly tacky, and then placing your decorations. This prevents your items from just sinking to the bottom of the mold and looking messy.
- 5. After you’ve arranged everything, it’s time to pour the final layer. Do this slowly to minimize air bubbles. If you see little bubbles rising to the surface, don’t panic; just take a handheld butane torch or even a quick pass with a hair dryer to pop them. It’s a small trick, but it makes a massive difference in how professional the final piece looks.
- 6. Now comes the hardest part for anyone with a busy schedule: waiting. Cover your molds with a large box or a plastic bin to keep dust and pet hair from settling into your work, and then leave it alone. Most resins need 24 to 48 hours to fully cure. I’ve learned the hard way that checking on it every hour doesn’t make it dry faster—it just makes you lose your mind.
- 7. Once everything is rock hard, pop your creations out of the molds. If the edges feel a little sharp, you can give them a quick, gentle buff with some fine-grit sandpaper under a bit of running water. Take a look at what you’ve made and give yourself credit. You didn’t just make a trinket; you successfully managed a process from start to finish, and that’s a win in my book.
The Essential Resin Art Supplies You Actually Need

Look, I’ve seen too many people dive into this hobby only to end up with a sticky mess and a pile of wasted money. You don’t need a professional studio, but you do need to be smart about your essential resin art supplies. Start with a high-quality, clear epoxy; if it’s cloudy from the start, your finished piece will never look professional. Most importantly, don’t skip the safety gear. I keep a dedicated kit in my craft room—nitrile gloves, a respirator, and a well-ventilated space—because taking proper safety precautions for epoxy resin isn’t optional, it’s a necessity for your peace of mind.
When it comes to the actual tools, simplicity wins. Grab a few silicone resin molds for beginners—think coasters or small jewelry trays—so you aren’t fighting complex shapes while you’re still learning the ropes. Also, invest in a few sturdy silicone mixing cups. They’re easy to clean and save you from the headache of scrubbing resin out of plastic containers. Just remember: keep your workspace clear, keep your tools organized, and don’t rush the process.
Mastering Resin Mixing Ratios for Beginners Without the Mess

Look, if there is one thing I’ve learned from years of managing complex projects and restoring old furniture, it’s that precision matters. You can have the most beautiful colors in the world, but if your math is off, you’re going to end up with a sticky, gummy mess that never quite hardens. When you’re working through resin mixing ratios for beginners, don’t try to eyeball it. Even a tiny deviation can ruin the whole batch. I always tell my clients: measure twice, pour once. Use a digital scale if you can; it’s much more reliable than those finicky measuring cups, especially when you’re working with a small volume.
Once you’ve got your ratios dialed in, the real trick is the stir. Don’t rush this part. I like to scrape the sides and the bottom of the cup every few seconds to ensure everything is fully incorporated. If you stir too fast, you’ll introduce air, and we definitely want to know how to prevent resin bubbles from ruining your hard work. A slow, steady movement is your best friend here. It takes a little more patience, but trust me, it’s much better than spending three hours trying to sand down a botched pour.
Five Ways to Keep Your Resin Projects from Turning into a Total Disaster

- Watch your temperature like a hawk. If your workspace is too cold, your resin will stay tacky and never fully cure, leaving you with a sticky mess that’ll drive you crazy. Keep the room warm and steady.
- Stop trying to use every glitter jar in the house at once. It’s tempting, but overdoing the inclusions makes the piece look cluttered rather than intentional. Start with one or two elements so you can actually see the depth of the resin.
- Invest in a decent heat gun or even just a handheld butane torch. You’re going to get tiny bubbles trapped in your pour, and instead of panicking, you’ll just lightly skim the surface to pop them instantly.
- Don’t skimp on the protection. I know, it’s a hassle, but put on a mask and work in a space with actual airflow. You don’t want to be breathing in those fumes while you’re trying to enjoy your afternoon.
- Give yourself a buffer zone for drying time. I’ve learned the hard way that “dry to the touch” doesn’t mean “ready to handle.” Leave your pieces alone for the full duration recommended on the bottle—patience is your best tool here.
Three Things to Remember Before You Start Pouring
Don’t go overboard with the fancy stuff; focus on getting your ratios right and keeping your workspace clean, and the rest will follow.
Patience is your best tool—resist the urge to touch or move your piece before it’s fully cured, or you’ll just end up with a sticky mess.
Safety isn’t optional, so keep that mask on and work in a ventilated area; I’d rather you be a little bored by the fumes than actually breathing them in.
Making It Your Own

Look, I know it feels like a lot when you’re staring at a pile of sticky bottles and a messy workspace, but we’ve already done the heavy lifting. We’ve covered the gear you actually need, walked through the steps of a successful pour, and tackled those tricky mixing ratios that usually trip people up. The most important thing to remember is that resin is a bit of a science, but it doesn’t have to be a stifling one. As long as you respect the ratios and keep your workspace organized—maybe keep one of those little notebooks handy to track your drying times—you are going to be just fine. Don’t worry about perfection; just focus on getting the basics right so you can actually enjoy the process.
At the end of the day, the goal isn’t to become a world-class artist overnight; it’s about the satisfaction of making something tangible with your own two hands. There is something incredibly grounding about seeing a project go from a liquid mess to a solid, beautiful piece of decor sitting on your coffee table. So, clear off a corner of the kitchen counter, put on some music, and just start pouring. You might make a mistake or two, but that’s just part of the learning curve. I promise you, once you see that first clear, glossy finish, you’ll be hooked. Let’s get to work.
Frequently Asked Questions
Is it actually safe to do this in my kitchen, or do I really need a dedicated workspace?
Look, I get it—you want to get started right now, and your kitchen table is staring you in the face. But let’s be real: resin isn’t food, and you don’t want it anywhere near your coffee mug. If you can’t commit to a dedicated garage space or a spare room, clear off a small corner of a desk or a folding table. Just make sure it’s well-ventilated and easy to cover with plastic. Keep the kitchen for cooking; keep the resin for a controlled zone.
How do I stop those annoying tiny bubbles from ruining my piece without buying a professional vacuum chamber?
Look, I get it. You pour a beautiful piece, wait for it to dry, and then find a cluster of bubbles right where you didn’t want them. You don’t need a vacuum chamber to fix this. First, let your resin sit for a few minutes after mixing to let the initial air escape. Then, use a long-reach lighter or a heat gun to gently skim the surface. Just a quick pass—don’t overheat it or you’ll warp the piece.
What happens if I mess up the ratio—can I actually save the mixture, or is it just a waste of money?
Look, I’ve been there—staring at a sticky, half-cured mess while questioning my life choices. Honestly? If the ratio is off, you usually can’t “fix” it. Once it starts reacting, you’re fighting a losing battle. My advice: don’t try to rescue a bad batch. It’s a waste of your time and your sanity. Just scrap it, grab a fresh cup, and start over. It’s a small loss now to avoid a massive headache later.




