Handmade Candle Making: Everything You Need to Get Started
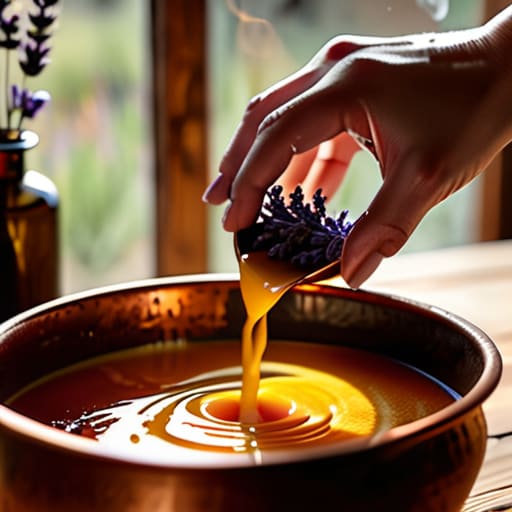
I used to think that learning how to make candles required a chemistry degree and a kitchen that looked more like a high-end laboratory. I spent a small fortune on fancy kits and expensive scents, only to end up with lumpy, soot-heavy messes that smelled more like a burnt campfire than a relaxing sanctuary. It was frustrating, expensive, and frankly, a complete waste of my time. The truth is, you don’t need a specialized studio or a mountain of specialized equipment to get it right; you just need a solid process and the right mindset to stop overcomplicating the basics.
In this guide, I’m stripping away the fluff and the marketing hype to show you the real way to get results. I’ll walk you through the essential supplies, the exact temperature checks that actually matter, and the little tricks I’ve learned from years of trial and error in my own kitchen. We aren’t going for perfectionist-level complexity here—we are aiming for functional, beautiful candles that actually burn well and make your home feel intentional. Let’s roll up our sleeves and finally get this done.
Table of Contents
- Step-by-Step Instructions
- Grab Your Soy Wax Candle Making Supplies and Just Start
- Essential Oils for Scented Candles Simple Scents That Actually Work
- Five Pro-Tips to Save You from a Scentless or Messy Disaster
- The Bottom Line: Keep It Simple and Just Start
- Don't Let Perfection Get in the Way
- Frequently Asked Questions
Guide Overview
Tools & Supplies
- Double boiler or heat-proof bowl and pot for melting
- Thermometer to monitor wax temperature
- Pouring pitcher for controlled pouring
- Digital scale for precise measurements
- Soy or paraffin wax (approx. 2 lbs)
- Cotton wicks (set of 10-20)
- Fragrance oils (1-2 oz)
- Candle jars or containers (4-6 units)
Step-by-Step Instructions
- 1. First things first, gather your supplies. You don’t need a professional lab, but you do need the right basics: soy wax flakes (they’re much easier to work with than paraffin), cotton wicks, some heat-safe glass jars, and a thermometer. I always keep a dedicated thermometer in my kitchen kit for this because guessing the temperature is the fastest way to ruin a batch.
- 2. Set up a double boiler. If you don’t have a professional one, just grab a medium saucepan and nestle a glass measuring pitcher inside it. Fill the pan with water and bring it to a gentle simmer. You want the wax to melt gradually and evenly; rushing the process with high heat is a recipe for a messy, scorched disaster.
- 3. Once the wax is completely liquid, pull it off the heat and let it sit for a minute. This is where most people trip up. You need to wait until the wax cools down to about 185°F before adding your fragrance oils. If the wax is too hot, your scent will literally evaporate into thin air instead of binding with the wax, leaving you with a candle that smells like nothing.
- 4. Prep your jars by centering the wicks. I use a tiny bit of melted wax or a glue dot to stick the metal base of the wick to the bottom of the jar. To keep the wick from leaning or sliding while the wax sets, I use a clothespin or a popsicle stick with a hole in it to hold it perfectly upright. It’s a small tweak, but it makes the difference between a straight burn and a lopsided mess.
- 5. Pour the wax slowly. This is the part where you need a steady hand. Aim for the center of the jar and pour in a slow, continuous stream to avoid creating air bubbles. Don’t try to fill it to the very brim, either; leave about a half-inch of space at the top so you don’t overflow when the wax contracts as it cools.
- 6. Patience is a virtue, especially here. Let your candles sit undisturbed on a flat surface at room temperature. Do not put them in the fridge to speed things up—that’s a classic mistake that causes the wax to crack. I usually just set it and forget it for at least 24 hours before I even think about trimming the wicks.
- 7. Finally, trim those wicks. Once the candle is fully hardened, snip the wick down to about a quarter-inch. If you leave it too long, you’ll get a massive, smoky flame; if it’s too short, it won’t stay lit. Trim them carefully, and you’re officially ready to light your creation and enjoy the glow.
Grab Your Soy Wax Candle Making Supplies and Just Start

Look, I know the temptation to spend three weeks researching every single brand of equipment before you even melt a single ounce of wax, but let’s be real: you don’t need a professional laboratory to get this done. When you’re gathering your soy wax candle making supplies, stick to the basics. Grab a decent thermometer, a pouring pitcher, and some containers that can handle heat. I used to get paralyzed by choice when I first started, but the secret is to just get the essentials on the table and start experimenting.
One thing I’ve learned through trial and error—and a few messy kitchen counters—is that your scent and your burn are everything. If you want a clean, long-lasting scent, invest in high-quality essential oils for scented candles rather than cheap synthetic fragrances that smell like a chemistry set. Also, pay close attention to your wick choice; using the wrong wick is the fastest way to end up with a candle that either tunnels down the middle or smokes like a campfire. Don’t sweat perfection on your first try, just focus on the fundamentals and go from there.
Essential Oils for Scented Candles Simple Scents That Actually Work

Look, I’ve learned the hard way that more isn’t always better when it comes to fragrance. When you’re first starting out with candle making for beginners, the temptation is to mix ten different scents together to create something “complex.” Please, don’t do that. You’ll just end up with a muddy, confusing smell that gives you a headache. Instead, stick to one or two high-quality essential oils. I personally love a simple blend of lavender and cedarwood; it’s grounding, clean, and doesn’t fight with the natural scent of the wax.
The real trick to getting a scent that actually fills a room—rather than just sitting there looking pretty—is all about the timing. If you dump your essential oils for scented candles into the wax while it’s boiling hot, you’ll literally cook the scent right out of it. You need to wait until the wax has cooled down to a specific point before stirring them in. It’s a small detail, but it’s the difference between a candle that smells like a spa and one that smells like nothing at all. Keep it simple, watch your temperature, and you’ll be fine.
Five Pro-Tips to Save You from a Scentless or Messy Disaster

- Don’t rush the scent. Once you add your essential oils to the melted wax, give it a gentle, steady stir for at least two full minutes. If you don’t, the oil won’t bond properly, and you’ll end up with a candle that smells like nothing when you actually light it.
- Watch your temperature like a hawk. If you pour your wax while it’s too hot, you’ll get those ugly sinkholes around the wick. Wait until it cools down just a bit—it should look slightly cloudy before you pour—to ensure a smooth, professional finish.
- Center that wick properly. There is nothing more frustrating than a candle that burns unevenly because the wick is leaning to one side. I always use a clothespin or even a popsicle stick across the top of the jar to keep everything perfectly centered while the wax sets.
- Give them time to breathe. I know you’ll want to light your new creation immediately, but resist the urge. Let your candles cure for at least a week (especially with soy wax). It takes time for the fragrance to fully settle into the wax structure.
- Keep a “cleanup kit” handy. Wax is a nightmare to scrub off once it hardens. Keep some isopropyl alcohol and paper towels right next to your workspace so you can wipe up spills immediately instead of spending twenty minutes scrubbing your counters later.
The Bottom Line: Keep It Simple and Just Start
Don’t get paralyzed by the gear; start with the basics—good wax, a decent wick, and a container you already own—and build from there.
Scent is tricky, so test small. Use high-quality essential oils and don’t go overboard; you want a subtle vibe, not a headache.
Perfection is the enemy of progress. Your first batch might have a wonky surface, but as long as it burns clean, you’ve won the day.
Don't Let Perfection Get in the Way

At the end of the day, making your own candles isn’t about achieving some high-end boutique aesthetic on your very first try. It’s about the process: getting your soy wax at the right temperature, choosing scents that actually make you feel calm, and successfully setting those wicks. You might end up with a slightly uneven surface or a scent that’s a bit stronger than you intended, but that’s just part of the learning curve. The most important thing is that you’ve moved from thinking about doing it to actually having a finished product sitting on your coffee table. Just remember to keep your workspace tidy and your wax temperatures steady, and you’ll find your rhythm in no time.
I know how easy it is to look at a complicated hobby and decide it’s just one more thing on an already overflowing to-do list. But there is something incredibly grounding about working with your hands and creating something functional for your own home. Don’t wait for the perfect moment or a complete set of professional-grade tools to begin. Grab what you have, clear off a corner of the kitchen counter, and just start making. Once that first candle is lit and your living room finally smells like home, you’ll realize that the small effort was well worth the payoff.
Frequently Asked Questions
Why is my candle surface looking bumpy or uneven once it cools?
Look, I’ve been there—you spend an hour pouring, only to find a lumpy, cratered mess once it sets. It’s frustrating, but it’s usually just a temperature issue. If your wax cools too fast or your room is drafty, it shrinks unevenly, creating those bumps. To fix it, just grab a heat gun or a hair dryer on low and lightly melt that top layer until it’s smooth again. Don’t sweat it; it’s an easy fix.
How do I know if I've added too much essential oil and ruined the scent throw?
Look, I’ve definitely been there—standing over a pot of wax, thinking, “More oil will surely make it smell better.” Usually, it just makes it worse. If you notice your wax looks oily or has beads on the surface, or if the candle starts smoking excessively when lit, you’ve gone overboard. Too much oil messes with the burn and can even become a fire hazard. If it looks greasy, it’s a sign to scale back next time.
Is it safe to use any old jar I find, or do I need specific containers for these?
Look, I love a good thrift store find as much as the next person, but please don’t just grab any old jar. If it’s going to hold hot wax, it needs to be heat-resistant. Glass that isn’t tempered can crack or even shatter when the temperature shifts. Stick to mason jars or dedicated candle tins for your first few batches. It’s not worth the mess—or the risk—to cut corners on safety.




