Master the Art of Patching Drywall Holes Like a Pro
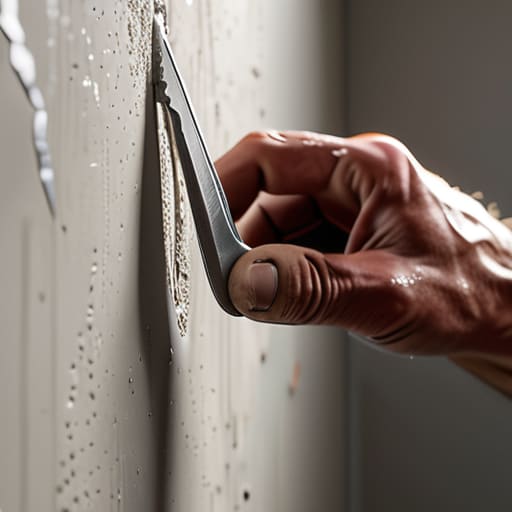
I was staring at that jagged, gaping crater in the hallway—the one my teenager left behind during a particularly frantic soccer practice drill—and I felt that familiar, heavy knot of mental fatigue tightening in my chest. It wasn’t just the damage; it was the feeling that my house was slowly slipping into a state of disrepair that I just didn’t have the bandwidth to manage. We’ve all been told that learning how to patch a hole in the wall is some massive, daunting weekend project that requires a professional contractor and a specialized toolkit, but honestly? That’s just a myth that keeps us stuck in a cycle of procrastination.
I’m not here to sell you on a complicated, multi-step construction process that leaves your living room looking like a disaster zone. Instead, I’m going to show you the most efficient, straight-to-the-point method to get that drywall looking seamless again so you can stop looking at it and get back to your life. We’re going to skip the fluff and focus on the exact tools and movements you need to achieve a professional finish without the headache. Let’s just grab the spackle and get this done.
Table of Contents
Guide Overview
Tools & Supplies
- Putty knife for spreading compound
- Sanding block for smoothing surfaces
- Utility knife for trimming edges
- Spackle or joint compound (small tub)
- Adhesive wall patch or mesh tape (1-2 pieces)
- Sandpaper (fine grit)
- Touch-up paint (small container)
Step-by-Step Instructions
- 1. First, you need to assess the damage. If it’s just a tiny little ding from a door handle or a stray nail, you can skip the heavy lifting. But if it’s a real crater, you’ll want to grab a utility knife and trim away any loose bits of drywall or peeling paint around the edges. You want a clean, stable surface to work with, not a bunch of crumbling debris that’s just going to make your patch fail later.
- 2. Next, grab your spackle. For small holes, a lightweight spackle is your best friend because it dries fast and doesn’t shrink like crazy. Use a putty knife to scoop some up and press it firmly into the hole. Don’t just smear it on the surface; you want to make sure you’re actually filling the cavity so there aren’t any air pockets hiding underneath.
- 3. Once you’ve filled it, don’t go overboard with the volume. You want to swipe the knife across the hole to get it as level as possible with the rest of the wall. It’s actually much easier to apply a second, thinner layer later than it is to sand down a massive, uneven mountain of dried compound. Just keep it smooth and don’t overthink it.
- 4. Now comes the part most people dread: the waiting game. You have to let that spackle dry completely. Depending on the brand and how deep the hole is, this could take anywhere from twenty minutes to a few hours. I always tell my clients that patience is a tool just like a hammer; if you try to sand it while it’s still damp, you’re just going to turn your wall into a muddy mess.
- 5. Once it’s bone-dry, grab a fine-grit sanding sponge. You aren’t trying to sand the whole wall down, just the edges of the patch. Lightly sand in a circular motion until the patch feels perfectly flush with the surrounding drywall. Run your hand over it—if you can feel a bump or a ridge, keep sanding. If it feels smooth to the touch, you’re ready for the next step.
- 6. Before you even think about touching a paintbrush, wipe the area down with a slightly damp microfiber cloth. You need to get rid of every last bit of white dust left behind by the sanding. If you paint right over that dust, the paint won’t stick properly, and you’ll end up with a flaky, unprofessional finish that will just drive you crazy every time you walk past it.
- 7. Finally, it’s time to paint. If you have the original paint can tucked away in the garage, you’re golden. If not, you might need to take a small chip of the dried paint to the hardware store to get a match. Use a small roller rather than a brush if you can; it helps the texture of the new paint blend seamlessly with the rest of the wall. Dab it on, let it dry, and congratulations—the eyesore is gone.
Grab a Drywall Patch Kit for Small Holes

If you’re staring at a hole from a rogue doorknob or a wayward toy and feeling a bit overwhelmed, let me save you some time: don’t go buying a whole bucket of heavy-duty mud. For these little mishaps, I always recommend grabbing a drywall patch kit for small holes. These kits are a lifesaver because they usually come with everything you need—the patch, the compound, and sometimes even a small spreader—all in one little package. It takes the guesswork out of the equation and keeps your garage from becoming a graveyard of half-used construction supplies.
When you’re working with these kits, the trick is to keep your layers thin. Instead of trying to fill the void in one go, focus on a light spackling compound application first. It’s much easier to add a second thin layer than it is to sand down a massive, messy mound later. Once it’s dry, take your time to sand the surface smooth with a fine-grit sponge. If you rush the sanding, you’ll end up with a bump that catches the light every time you walk past, and we are definitely not about that life.
Mastering Spackling Compound Application Without the Mess

Now, here is where most people lose their patience: the actual spreading of the goop. When it comes to spackling compound application, less is almost always more. I know the temptation is to glob it on thick to “make sure” the hole is filled, but that just creates a mountain of sanding later that will drive you crazy. Instead, use your putty knife to press the compound into the hole, then swipe across it with a light, steady hand. You want to aim for a surface that is nearly flush with the rest of the wall. If you leave it too thick, you’ll end up with a bump that’s impossible to hide once you paint.
If you find yourself dealing with something a bit more substantial, remember that your goal isn’t just to fill the void, but to create a seamless transition. If you’re using mesh tape for wall repair, make sure it’s firmly embedded in that first layer so it doesn’t bubble up. Once it’s dry, don’t rush the sanding. Take your time to sand drywall smooth using a fine-grit sandpaper; if you can run your hand over the patch and not feel a single ridge, you’ve done it right.
Pro Tips to Keep the Chaos at Bay

- Don’t skip the sanding. I know, it’s dusty and a total pain, but if you don’t sand that spackle smooth before you paint, you’ll be staring at a bump every time the light hits it.
- Clean the area first. Grab a damp cloth and wipe away any loose dust or old paint flakes around the hole; if you’re patching over grit, your fix isn’t going to stick, and you’ll be doing this all over again next week.
- Less is actually more. It’s tempting to glob the compound on to fill the gap quickly, but it’s much easier to do two thin layers than one massive, messy one that takes forever to dry.
- Check your lighting. Grab a flashlight or a work lamp and shine it sideways across the patch—it’ll reveal any tiny imperfections or ridges you missed while you were in the zone.
- Keep a damp rag handy. I keep one in my pocket for a reason; if you get a little bit of spackle on your trim or your floor, wipe it up immediately before it hardens into a permanent headache.
The Bottom Line: Get It Done and Move On
Don’t overthink the tools; a decent patch kit and a steady hand with a putty knife are all you really need to stop that hole from driving you crazy.
Patience is your best friend here—apply thin layers of spackle rather than one giant glob, or you’ll spend way more time sanding than you ever intended.
Focus on the finish, not perfection; a quick sand and a dab of matching paint will make that repair disappear so you can get back to your actual life.
Done and Dusted

At the end of the day, fixing that hole isn’t about becoming a master contractor; it’s about the simple satisfaction of seeing a problem through to the finish line. We’ve covered the essentials: grabbing the right patch kit, applying that spackle with a steady hand to avoid a massive cleanup, and ensuring everything is sanded down until it’s smooth. If you followed these steps, you’ve successfully turned a distracting eyesore back into a seamless part of your home. Remember, the goal wasn’t perfection for perfection’s sake, but rather to remove the distraction so you can get back to actually living in your space.
I know how easy it is to look at a damaged wall and think, “I’ll deal with that next weekend,” only to have that “next weekend” turn into next month. But there is a specific kind of peace that comes from tackling the small stuff before it piles up. By taking twenty minutes to patch that dent or hole, you aren’t just fixing drywall; you are reclaiming your mental bandwidth. Don’t let the little things weigh you down or clutter your mind. Get it fixed, sand it smooth, and move on to something better. You’ve got this.
Frequently Asked Questions
How do I know if the hole is too big for a simple patch kit and requires actual new drywall?
Look, I’ve been there—staring at a hole and wondering if I’m about to start a weekend-long construction project. Here’s my rule of thumb: if you can see through the wall to the other side, or if the hole is larger than a standard sticky note, put the patch kit away. At that point, you’re past a quick fix and need to cut out a piece of fresh drywall. Don’t waste your time fighting a losing battle.
What’s the best way to sand the patch so it doesn't look like a lumpy bump once I paint it?
The secret to a seamless finish is patience and the right grit. Grab a fine-grit sanding sponge—don’t go too coarse or you’ll gouge the drywall—and use light, circular motions. I always tell myself: “feather the edges.” You want to sand the patch so it blends into the surrounding wall, not just the bump itself. Run your hand over it; if you can feel a ridge, it’ll show once it’s painted.
Can I just use regular white toothpaste if I'm in a pinch, or will that ruin my wall?
Look, I get the temptation—it’s right there in the bathroom and it’s white—but please, don’t do it. Toothpaste isn’t designed to bond with drywall, and once it dries, it’s going to shrink, crack, and look even worse than the hole did. It’ll also be a nightmare to sand down. Save yourself the extra work and the headache; just grab a $5 tub of spackle. It’s worth the five-minute trip to the hardware store.




